Christmas M&M Cookie Bars – Festive, Chewy, and Crowd-Pleasing
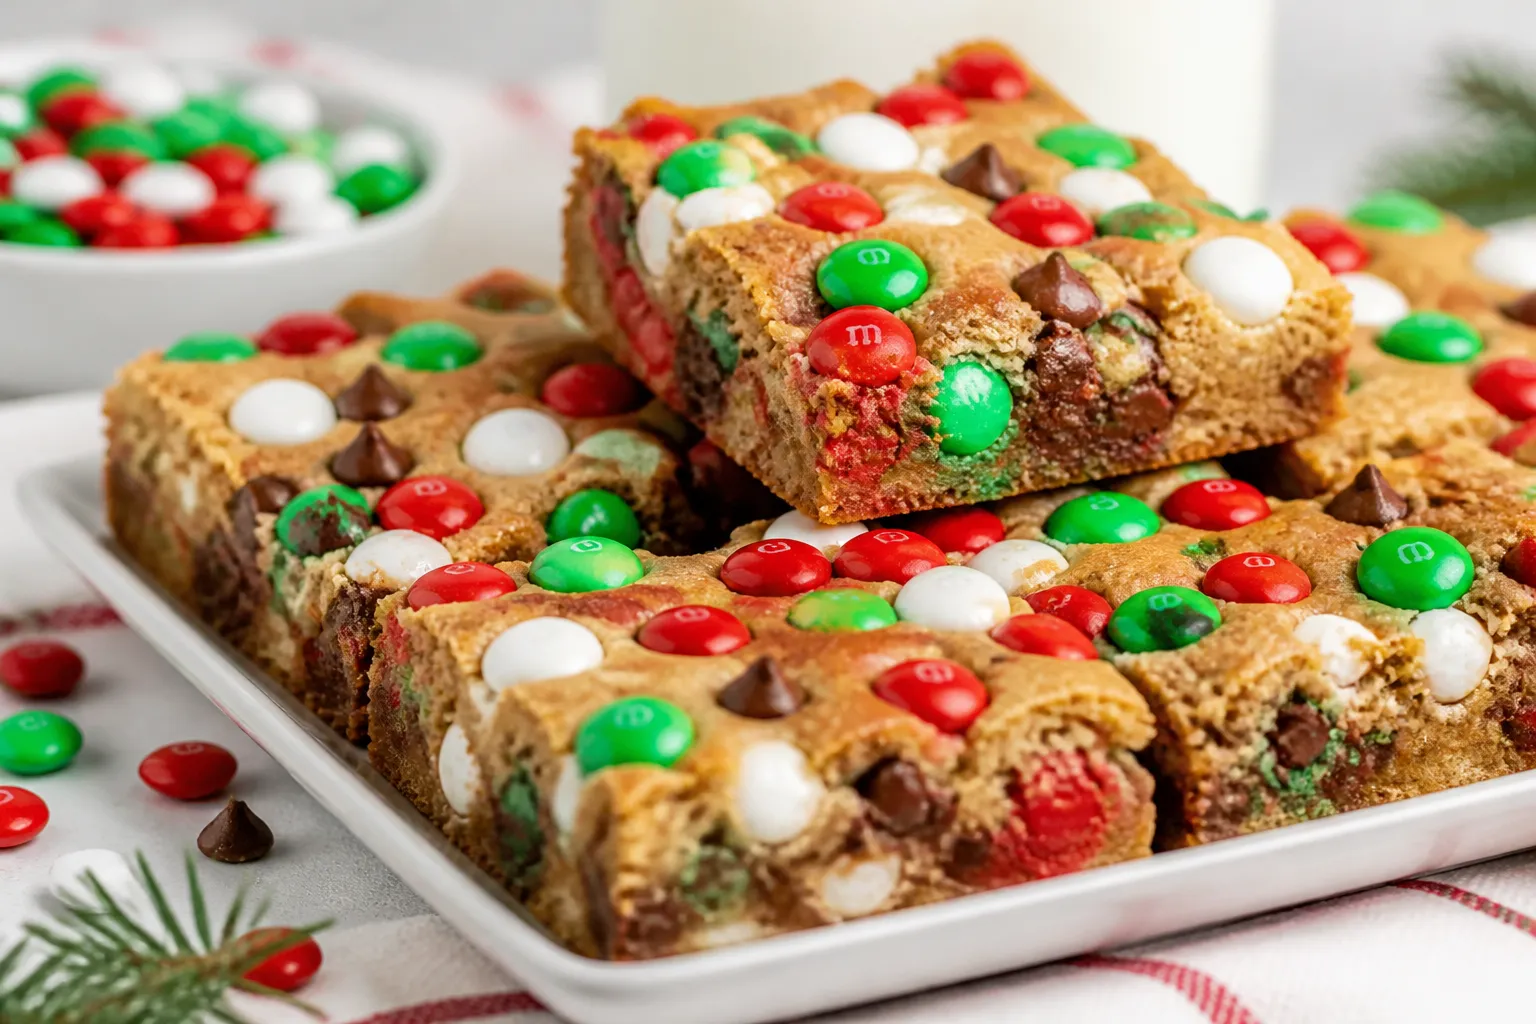
These Christmas M&M Cookie Bars bring all the holiday cheer with minimal fuss. They’re soft, chewy, a little gooey in the center, and studded with red-and-green M&Ms that make every slice look festive. You mix the dough in one bowl, press it into a pan, and bake—no scooping or chilling.
It’s the kind of low-stress recipe you can pull off on a busy December afternoon. Serve them warm with hot cocoa, and you’ve got instant holiday magic.
Ingredients
Method
- Prep the pan. Heat your oven to 350°F (175°C). Line a 9x13-inch baking pan with parchment, leaving an overhang for easy lifting. Lightly spray the parchment and sides.
- Melt the butter. Melt 1 cup (2 sticks) unsalted butter and let it cool for 5–10 minutes so it’s warm, not hot. This keeps the bars dense and chewy without scrambling the eggs.
- Whisk the sugars. In a large bowl, whisk together 1 cup packed brown sugar and 1/2 cup granulated sugar until there are no clumps. Pour in the melted butter and whisk until glossy and combined.
- Add eggs and vanilla. Whisk in 2 large eggs, one at a time, then 2 teaspoons vanilla extract. Mix just until smooth. Don’t overmix or you’ll add too much air.
- Combine dry ingredients. In a separate bowl, stir together 2 1/2 cups all-purpose flour, 2 teaspoons cornstarch, 1 teaspoon baking soda, and 3/4 teaspoon fine salt.
- Bring it all together. Add the dry ingredients to the wet and fold with a spatula until just combined. The dough will be thick.
- Stir in the goodies. Fold in 1 cup Christmas M&Ms and 3/4 cup semi-sweet chocolate chips. Reserve a small handful of M&Ms to press on top for a festive look.
- Press and top. Scrape the dough into the prepared pan and press it into an even layer. Sprinkle the reserved M&Ms over the top and gently press them in.
- Bake. Bake for 20–25 minutes, or until the edges are set and lightly golden, and the center looks slightly underbaked. Carryover heat will finish the job and keep the center soft.
- Finish and cool. If you like a sweet-salty finish, sprinkle a pinch of flaky sea salt over the hot bars. Cool in the pan on a rack for at least 30–45 minutes before lifting out and slicing.
- Slice cleanly. For neat edges, cool completely and use a sharp knife. For gooey centers, cut while slightly warm. Either way is delicious.
Why This Recipe Works

These bars use a classic brown sugar cookie base, which adds moisture and a deep, caramel-like flavor. A mix of butter and brown sugar gives you that soft, chewy texture with crisp edges.
We fold in M&Ms and chocolate chips so each bite has pops of color and melty chocolate. The dough bakes evenly in a pan, which means fewer steps and less cleanup. It’s reliable, forgiving, and easy to customize.
Shopping List
- Unsalted butter (melted and slightly cooled)
- Brown sugar (light or dark)
- Granulated sugar
- Large eggs
- Vanilla extract
- All-purpose flour
- Cornstarch (for extra softness, optional but recommended)
- Baking soda
- Fine salt
- Christmas M&Ms (red and green)
- Semi-sweet chocolate chips (or chunks)
- Flaky sea salt (optional, for finishing)
- Nonstick spray or parchment paper (for lining the pan)
Step-by-Step Instructions

- Prep the pan. Heat your oven to 350°F (175°C).
Line a 9×13-inch baking pan with parchment, leaving an overhang for easy lifting. Lightly spray the parchment and sides.
- Melt the butter. Melt 1 cup (2 sticks) unsalted butter and let it cool for 5–10 minutes so it’s warm, not hot. This keeps the bars dense and chewy without scrambling the eggs.
- Whisk the sugars. In a large bowl, whisk together 1 cup packed brown sugar and 1/2 cup granulated sugar until there are no clumps.
Pour in the melted butter and whisk until glossy and combined.
- Add eggs and vanilla. Whisk in 2 large eggs, one at a time, then 2 teaspoons vanilla extract. Mix just until smooth. Don’t overmix or you’ll add too much air.
- Combine dry ingredients. In a separate bowl, stir together 2 1/2 cups all-purpose flour, 2 teaspoons cornstarch, 1 teaspoon baking soda, and 3/4 teaspoon fine salt.
- Bring it all together. Add the dry ingredients to the wet and fold with a spatula until just combined. The dough will be thick.
- Stir in the goodies. Fold in 1 cup Christmas M&Ms and 3/4 cup semi-sweet chocolate chips.
Reserve a small handful of M&Ms to press on top for a festive look.
- Press and top. Scrape the dough into the prepared pan and press it into an even layer. Sprinkle the reserved M&Ms over the top and gently press them in.
- Bake. Bake for 20–25 minutes, or until the edges are set and lightly golden, and the center looks slightly underbaked. Carryover heat will finish the job and keep the center soft.
- Finish and cool. If you like a sweet-salty finish, sprinkle a pinch of flaky sea salt over the hot bars. Cool in the pan on a rack for at least 30–45 minutes before lifting out and slicing.
- Slice cleanly. For neat edges, cool completely and use a sharp knife.
For gooey centers, cut while slightly warm. Either way is delicious.
Keeping It Fresh
Store bars in an airtight container at room temperature for 3–4 days. If your kitchen is warm, add a slice of sandwich bread to the container to keep the bars soft.
For longer storage, wrap individual bars in plastic, place them in a freezer bag, and freeze for up to 2 months. Thaw at room temp or warm in the microwave for 10–15 seconds for that fresh-baked feel.

Benefits of This Recipe
- Fast and low-effort: No chilling, no scooping, and only one pan.
- Consistently chewy: Melted butter and brown sugar keep the texture soft.
- Festive and fun: The M&Ms bring holiday color without extra decorating.
- Feeds a crowd: A 9×13 pan yields plenty for parties, exchanges, or gifting.
- Flexible: Easy to swap in different mix-ins or flavors.
What Not to Do
- Don’t overbake. Dry bars happen fast. Pull them when the center still looks a touch soft.
- Don’t skip the parchment. It prevents sticking and helps you lift the bars out cleanly.
- Don’t dump hot butter onto eggs. Let the butter cool slightly to avoid curdling.
- Don’t overmix the batter. Too much stirring makes tough bars.
- Don’t add all the M&Ms on top. Mix most into the dough so every bite gets color and crunch.
Variations You Can Try
- Peppermint Crunch: Swap half the chocolate chips for crushed candy canes and add 1/2 teaspoon peppermint extract.
- White Chocolate Cranberry: Use white chocolate chips and dried cranberries with the M&Ms for a bright, tart twist.
- Salted Caramel Swirl: Drizzle 1/3 cup thick caramel sauce over the dough in the pan and swirl with a knife.
Finish with extra flaky sea salt.
- Gluten-Free: Use a 1:1 gluten-free flour blend that includes xanthan gum. Check your M&Ms package for any allergen notes.
- Nutty Noel: Fold in 1/2 cup chopped toasted pecans or walnuts for crunch and warmth.
- Double Chocolate: Replace 1/4 cup of flour with Dutch-process cocoa and use chocolate chunks plus M&Ms.
FAQ
Can I use mini M&Ms instead of regular?
Yes. Mini M&Ms spread more evenly through the dough, so you get color in every bite.
You may want to increase the amount slightly, up to 1 1/4 cups, since they’re smaller.
How do I know when the bars are done?
Look for edges that are set and lightly golden and a center that’s puffed and just a bit glossy. A toothpick should come out with a few moist crumbs. If it’s completely clean, they may be overbaked.
Can I halve the recipe?
Absolutely.
Bake in an 8×8- or 9×9-inch pan and start checking around 18–20 minutes. The bars will be slightly thicker in a smaller pan.
Do I need to chill the dough?
No. This recipe is designed to bake right away.
Chilling will make it firmer and can change the texture, so it’s not necessary here.
Can I make these dairy-free?
Yes. Use a plant-based butter stick (not a spread) and dairy-free chocolate chips. The texture will still be soft and chewy if you keep the same measurements.
Why add cornstarch?
Cornstarch softens the crumb and helps keep the bars tender for days.
If you don’t have it, you can skip it, but the bars may be a touch less soft.
How should I cut clean slices?
Let the bars cool completely, lift them out with the parchment, and use a sharp knife. Wipe the blade between cuts. For perfect squares, chill for 30 minutes before slicing.
Can I add sprinkles?
Yes.
Fold in 2–3 tablespoons holiday sprinkles with the M&Ms for extra color. Use jimmies or confetti sprinkles; avoid nonpareils, which can bleed color.
Wrapping Up
Christmas M&M Cookie Bars are the easy win of the season: simple to make, easy to share, and guaranteed to disappear fast. With a chewy center, crisp edges, and plenty of festive color, they check every holiday box.
Keep a batch on hand for parties, gifts, or cozy nights in. Once you try them, they’ll be a yearly tradition.
Printable Recipe Card
Want just the essential recipe details without scrolling through the article? Get our printable recipe card with just the ingredients and instructions.
About the Author

Brandon D
Blogger/Fitness & Wellness Coach
I create quick, healthy, family-friendly recipes that make dinner simple, delicious, and stress-free.