Peppermint Bark Brownies – Fudgy Brownies With a Festive Crunch
If you love classic peppermint bark and rich, gooey brownies, this recipe brings the best of both into one irresistibly festive treat. These Peppermint Bark Brownies are dense and fudgy with a crisp layer of white chocolate and crushed candy canes on top. They look beautiful on a holiday dessert tray but are simple enough for a casual weeknight bake.
The cool peppermint flavor balances the deep chocolate, and the textures—chewy, creamy, and crunchy—make every bite memorable. Bake a batch for a cookie exchange, a party, or a cozy night in with hot cocoa.

Ingredients
Method
- Prep the pan and oven. Heat oven to 350°F (175°C). Line an 8-inch square pan with parchment, leaving overhang for easy lifting. Lightly grease the parchment.
- Melt the butter and chocolate. In a heatproof bowl set over a pot of barely simmering water, melt the butter and semi-sweet chocolate, stirring until smooth. Or microwave in 20–30 second bursts, stirring in between. Let cool 5 minutes so it’s warm, not hot.
- Whisk in sugars. Add granulated and brown sugar to the melted chocolate. Whisk until glossy and combined.
- Add eggs and flavorings. Whisk in eggs and egg yolk one at a time until the batter looks thick and shiny. Stir in vanilla and peppermint extracts.
- Fold in the dry ingredients. Sift or whisk together flour, cocoa powder, and salt. Fold into the wet mixture with a spatula until just combined. Do not overmix. Fold in mini chocolate chips if using.
- Bake. Spread batter evenly in the pan. Bake 24–28 minutes, or until the edges are set and a toothpick inserted in the center comes out with a few moist crumbs. If it looks wet, give it another 2–3 minutes.
- Cool slightly. Set the pan on a rack and cool for 30–40 minutes. The brownies should still be a bit warm, which helps the topping adhere.
- Crush the candy canes. Place candy canes in a zip-top bag and crush with a rolling pin until you have a mix of small chunks and fine dust. The dust helps melt into the chocolate; the chunks add crunch.
- Melt the white chocolate. Gently melt white chocolate in a heatproof bowl over barely simmering water, stirring constantly. White chocolate scorches easily—keep heat low and avoid any water droplets. Stir in peppermint extract.
- Add the topping. Pour melted white chocolate over the warm brownies and smooth into an even layer. Immediately sprinkle crushed candy canes over the top, pressing very lightly so they stick.
- Set and slice. Refrigerate the pan for 30–45 minutes until the white chocolate is firm. Lift brownies out using the parchment and cut with a warm, sharp knife. Wipe the blade between cuts for clean layers.
What Makes This Recipe So Good
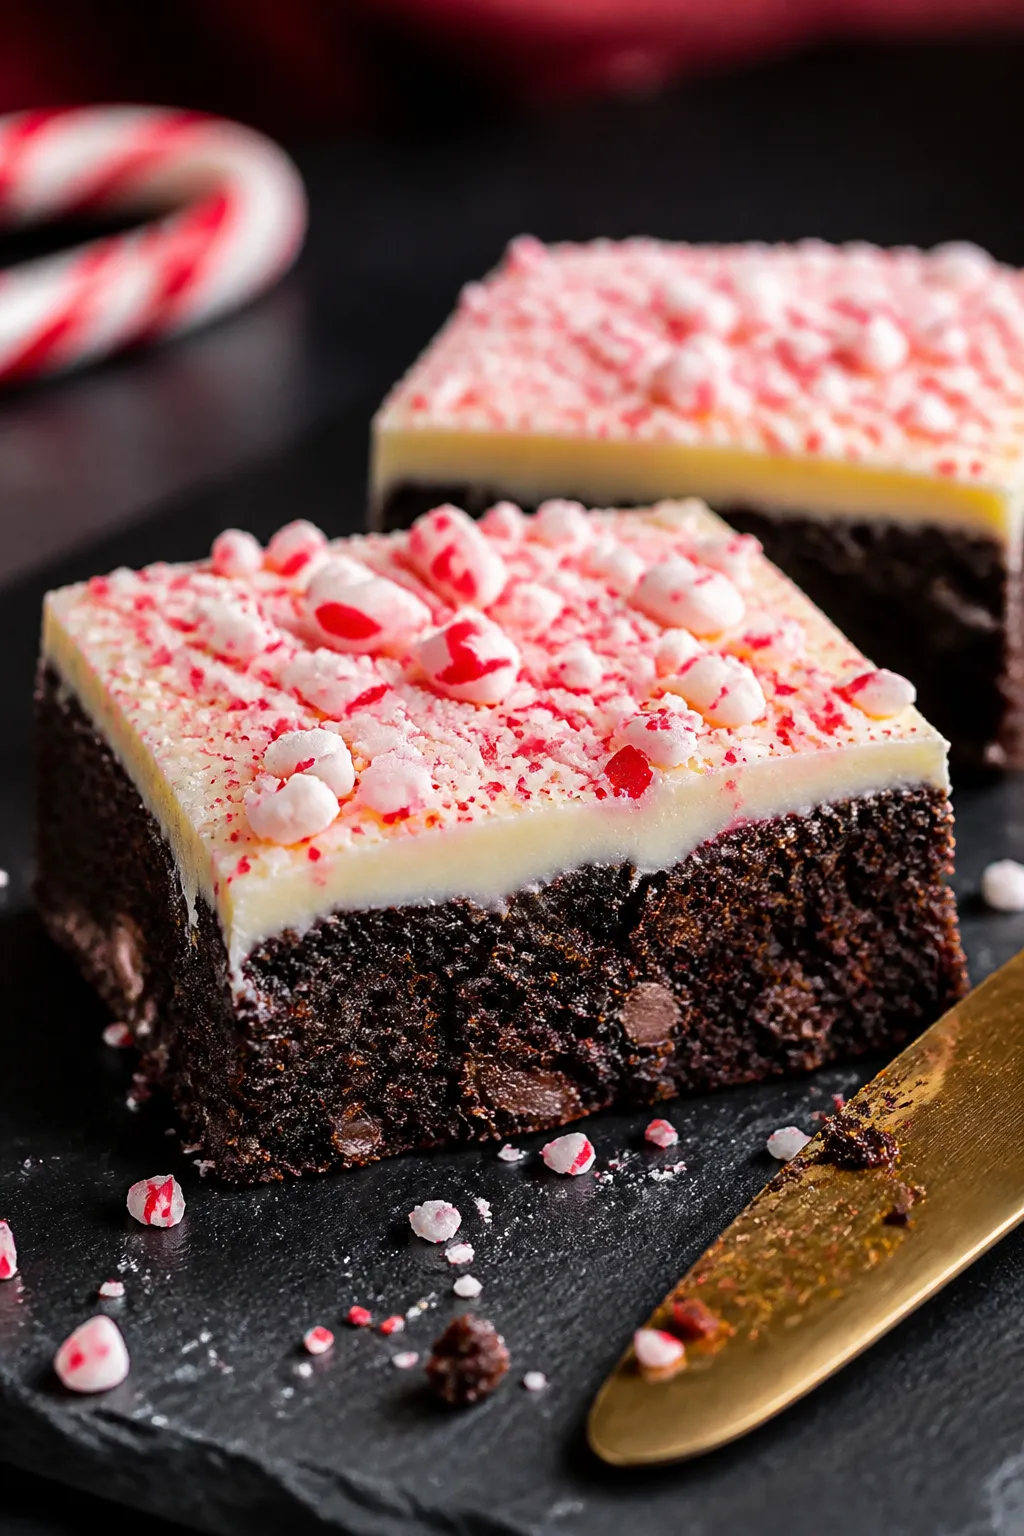
- Fudgy, not cakey: A higher ratio of butter and melted chocolate keeps the brownies dense and moist.
- True peppermint bark topping: A smooth white chocolate layer finished with crushed candy canes for that classic holiday snap.
- Balanced mint flavor: Peppermint extract is used with a light hand, so the mint lifts the chocolate without overpowering it.
- Easy to slice cleanly: Chilling the pan before cutting sets the topping, giving you neat edges and pretty layers.
- Foolproof method: Everything mixes in one bowl for the batter, and the topping melts in minutes.
Ingredients
- For the Brownies:
- 1/2 cup (115 g) unsalted butter
- 6 oz (170 g) semi-sweet chocolate, chopped (or chips)
- 1 cup (200 g) granulated sugar
- 1/2 cup (100 g) packed light brown sugar
- 2 large eggs, room temperature
- 1 large egg yolk, room temperature
- 1 tsp pure vanilla extract
- 1/2 tsp peppermint extract
- 3/4 cup (95 g) all-purpose flour, spooned and leveled
- 1/4 cup (25 g) unsweetened cocoa powder (natural or Dutch-process)
- 1/2 tsp fine sea salt
- 1/2 cup (85 g) mini chocolate chips or chopped chocolate (optional, for extra gooeyness)
- For the Peppermint Bark Topping:
- 10 oz (285 g) good-quality white chocolate, finely chopped or white chocolate chips
- 1/4 tsp peppermint extract
- 4–5 regular candy canes or 1 cup crushed peppermint candies
Step-by-Step Instructions
- Prep the pan and oven. Heat oven to 350°F (175°C). Line an 8-inch square pan with parchment, leaving overhang for easy lifting.
Lightly grease the parchment.
- Melt the butter and chocolate. In a heatproof bowl set over a pot of barely simmering water, melt the butter and semi-sweet chocolate, stirring until smooth. Or microwave in 20–30 second bursts, stirring in between. Let cool 5 minutes so it’s warm, not hot.
- Whisk in sugars. Add granulated and brown sugar to the melted chocolate.
Whisk until glossy and combined.
- Add eggs and flavorings. Whisk in eggs and egg yolk one at a time until the batter looks thick and shiny. Stir in vanilla and peppermint extracts.
- Fold in the dry ingredients. Sift or whisk together flour, cocoa powder, and salt. Fold into the wet mixture with a spatula until just combined.
Do not overmix. Fold in mini chocolate chips if using.
- Bake. Spread batter evenly in the pan. Bake 24–28 minutes, or until the edges are set and a toothpick inserted in the center comes out with a few moist crumbs.
If it looks wet, give it another 2–3 minutes.
- Cool slightly. Set the pan on a rack and cool for 30–40 minutes. The brownies should still be a bit warm, which helps the topping adhere.
- Crush the candy canes. Place candy canes in a zip-top bag and crush with a rolling pin until you have a mix of small chunks and fine dust. The dust helps melt into the chocolate; the chunks add crunch.
- Melt the white chocolate. Gently melt white chocolate in a heatproof bowl over barely simmering water, stirring constantly.
White chocolate scorches easily—keep heat low and avoid any water droplets. Stir in peppermint extract.
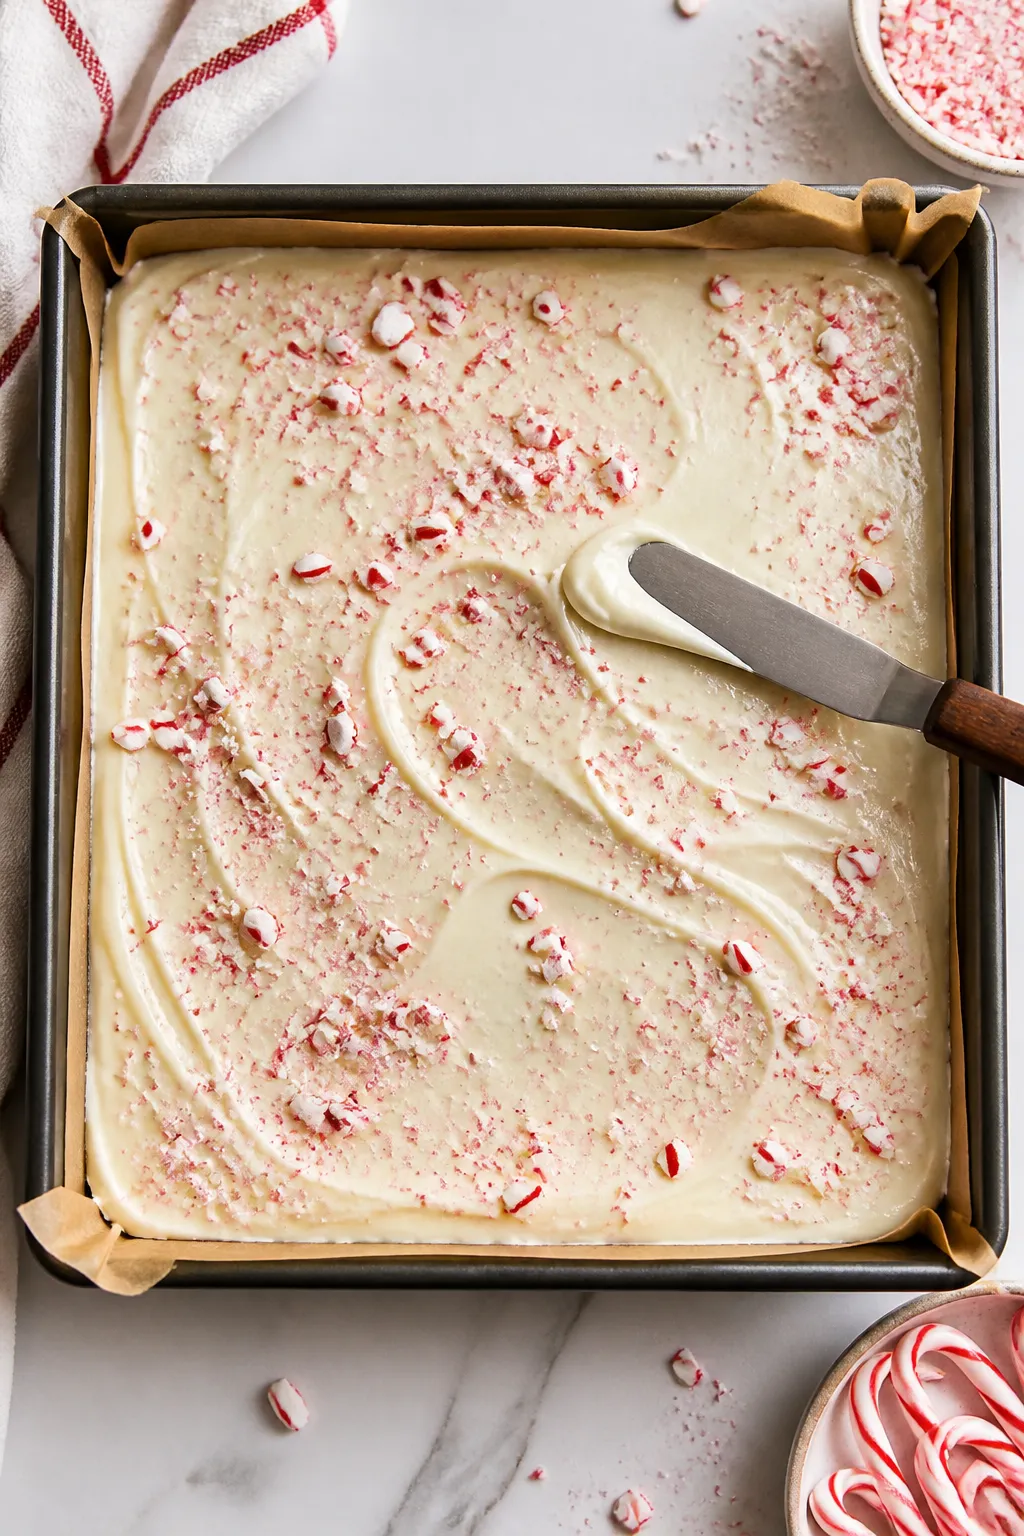
- Add the topping. Pour melted white chocolate over the warm brownies and smooth into an even layer. Immediately sprinkle crushed candy canes over the top, pressing very lightly so they stick.
- Set and slice. Refrigerate the pan for 30–45 minutes until the white chocolate is firm.
Lift brownies out using the parchment and cut with a warm, sharp knife. Wipe the blade between cuts for clean layers.
Storage Instructions
- Room temperature: Store in an airtight container for up to 3 days. Keep parchment between layers to protect the topping.
- Refrigerator: Keeps well for 5–6 days.
The chill helps the bark hold its snap.
- Freezer: Freeze cut squares on a sheet until firm, then transfer to a freezer bag for up to 2 months. Thaw in the fridge to prevent condensation on the white chocolate.

Benefits of This Recipe
- Holiday showstopper with minimal fuss: Looks bakery-level without special tools.
- Make-ahead friendly: The bark stays crisp and the brownie stays fudgy for days.
- Customizable sweetness: Use darker chocolate in the base or a thinner bark layer if you prefer less sweet.
- Kid-approved and giftable: Neat squares pack well for gifting or party platters.
What Not to Do
- Don’t overbake. Overbaking leads to dry, cakey brownies. Pull them when a few moist crumbs still cling to the toothpick.
- Don’t overheat white chocolate. It seizes easily.
Keep the heat low, stir often, and avoid contact with steam or water.
- Don’t skip the chill. Cutting before the topping sets will drag the bark and create messy edges.
- Don’t overdo the peppermint extract. Too much turns medicinal fast. Measure carefully.
- Don’t add candy canes to the batter. They melt and get sticky inside the brownie. Keep them on top for crunch.
Alternatives
- Gluten-free: Swap the all-purpose flour for a 1:1 gluten-free baking blend.
Let the batter rest 10 minutes before baking.
- Dairy-free: Use dairy-free butter, dark chocolate without milk solids, and a dairy-free white chocolate alternative. Texture remains close to the original.
- Less sweet: Use bittersweet chocolate (70%) in the batter and reduce granulated sugar to 3/4 cup. Keep the brown sugar for moisture.
- Swirled top: Spread melted semi-sweet chocolate in thin lines over the white chocolate and swipe with a toothpick for a marbled look.
- Mint-chocolate layer: Skip peppermint in the brownie and add 1/2 teaspoon peppermint oil to the white chocolate only for a stronger bark vibe.
- No-candy-cane option: Use crushed peppermint puffs or peppermint baking chips if candy canes aren’t available.
FAQ
Can I double the recipe?
Yes.
Bake in a 9×13-inch pan and increase the bake time to about 28–34 minutes. Keep an eye on the center and test for moist crumbs.
What if my white chocolate seizes?
If it turns thick and grainy, it likely came into contact with water or got too hot. Stir in 1–2 teaspoons of neutral oil to loosen it.
If it’s still lumpy, start over with clean, dry equipment and lower heat.
Can I use peppermint oil instead of extract?
You can, but it’s much stronger. Use about one-third the amount. Start with 1/8 teaspoon in the batter and 1/8 teaspoon in the topping, then adjust to taste.
How do I get super clean slices?
Chill the brownies until the topping is firm, then cut with a long, sharp knife warmed under hot water and dried.
Wipe the blade between each cut.
Do I have to use both granulated and brown sugar?
Using both adds depth and moisture. Brown sugar keeps the brownies fudgy and prevents a dry crumb. If needed, you can use all granulated sugar, but the texture will be slightly less chewy.
Why is my brownie center sinking?
This often happens if the batter is overmixed or underbaked.
Mix just until combined and bake until the edges are set with a faint jiggle in the center. Cooling in the pan helps it level out.
Can I add crushed candy canes inside the batter?
It’s not recommended. They melt and can create sticky pockets.
Keep the peppermint crunch on top for the best texture.
What white chocolate works best?
Use real white chocolate made with cocoa butter, not just vegetable fats. Bars or high-quality chips melt smoother and set with a clean snap.
In Conclusion
Peppermint Bark Brownies deliver everything you want from a holiday dessert: rich chocolate, cool mint, and that signature bark crunch. The method is straightforward, the ingredients are simple, and the payoff looks and tastes like a bakery treat.
Make them for gatherings, gifts, or a cozy night with a mug of something warm. Once you try them, they’ll become a go-to every winter.
Printable Recipe Card
Want just the essential recipe details without scrolling through the article? Get our printable recipe card with just the ingredients and instructions.
About the Author

Brandon D
Blogger/Fitness & Wellness Coach
I create quick, healthy, family-friendly recipes that make dinner simple, delicious, and stress-free.