Mini Santa Hat Cheesecakes – Festive, Bite-Sized Holiday Treats
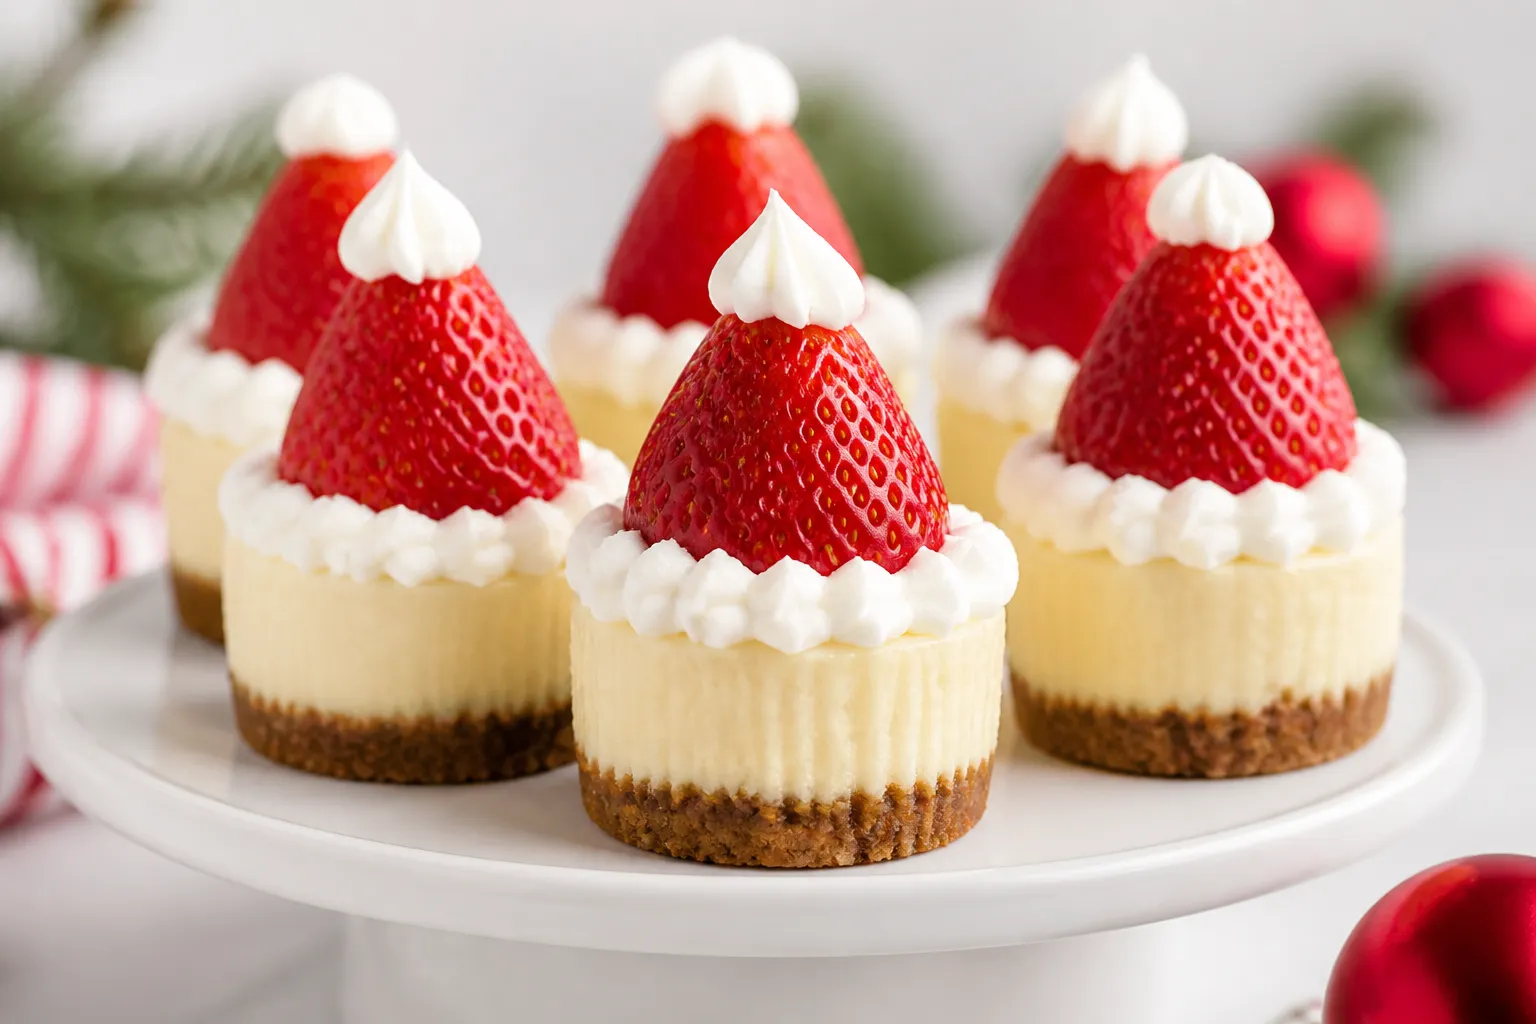
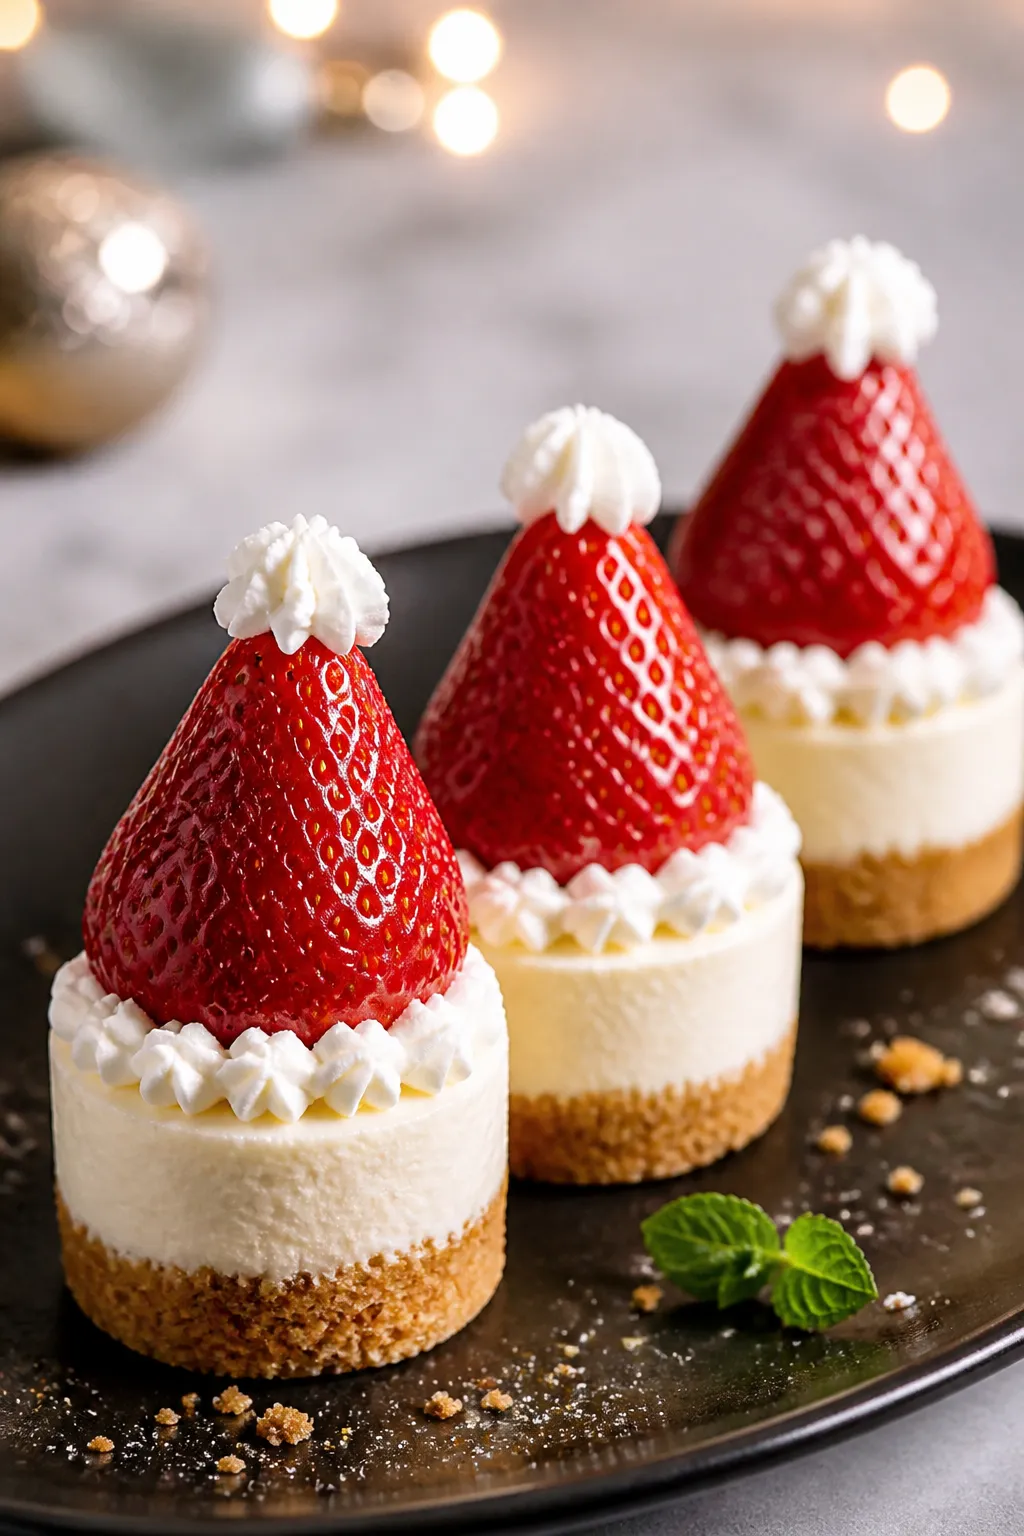
These cute Mini Santa Hat Cheesecakes are the kind of dessert that makes people smile before they even take a bite. They’re creamy, bright, and festive, and they’re incredibly easy to serve at parties. Each one is topped with a strawberry “hat” and a fluffy whipped cream “pom,” so they look like they came straight from the North Pole.
No slicing. No mess. Just a perfect, handheld holiday treat that tastes as good as it looks.
Ingredients
Method
- Prep the pan: Heat the oven to 325°F (163°C). Line a muffin pan with 12 cupcake liners.
- Make the crust: Stir graham crumbs, sugar, salt, and melted butter until the mixture looks like wet sand. Divide evenly among cups (about 1 tablespoon each). Press firmly with the bottom of a small glass.
- Par-bake the crust: Bake for 5–6 minutes. Remove and cool while you make the filling.
- Beat the cream cheese: In a large bowl, beat softened cream cheese on medium speed until completely smooth, about 1–2 minutes. Scrape the bowl.
- Add sugar and flavor: Mix in granulated sugar, sour cream, vanilla, lemon juice (if using), and a pinch of salt. Beat until smooth and creamy.
- Add eggs: Beat in the eggs one at a time on low until just combined. Do not overmix. Scrape the bowl and stir by hand to smooth the batter.
- Fill and smooth: Divide the batter among the cups, filling each about 3/4 full. Tap the pan gently to release air bubbles.
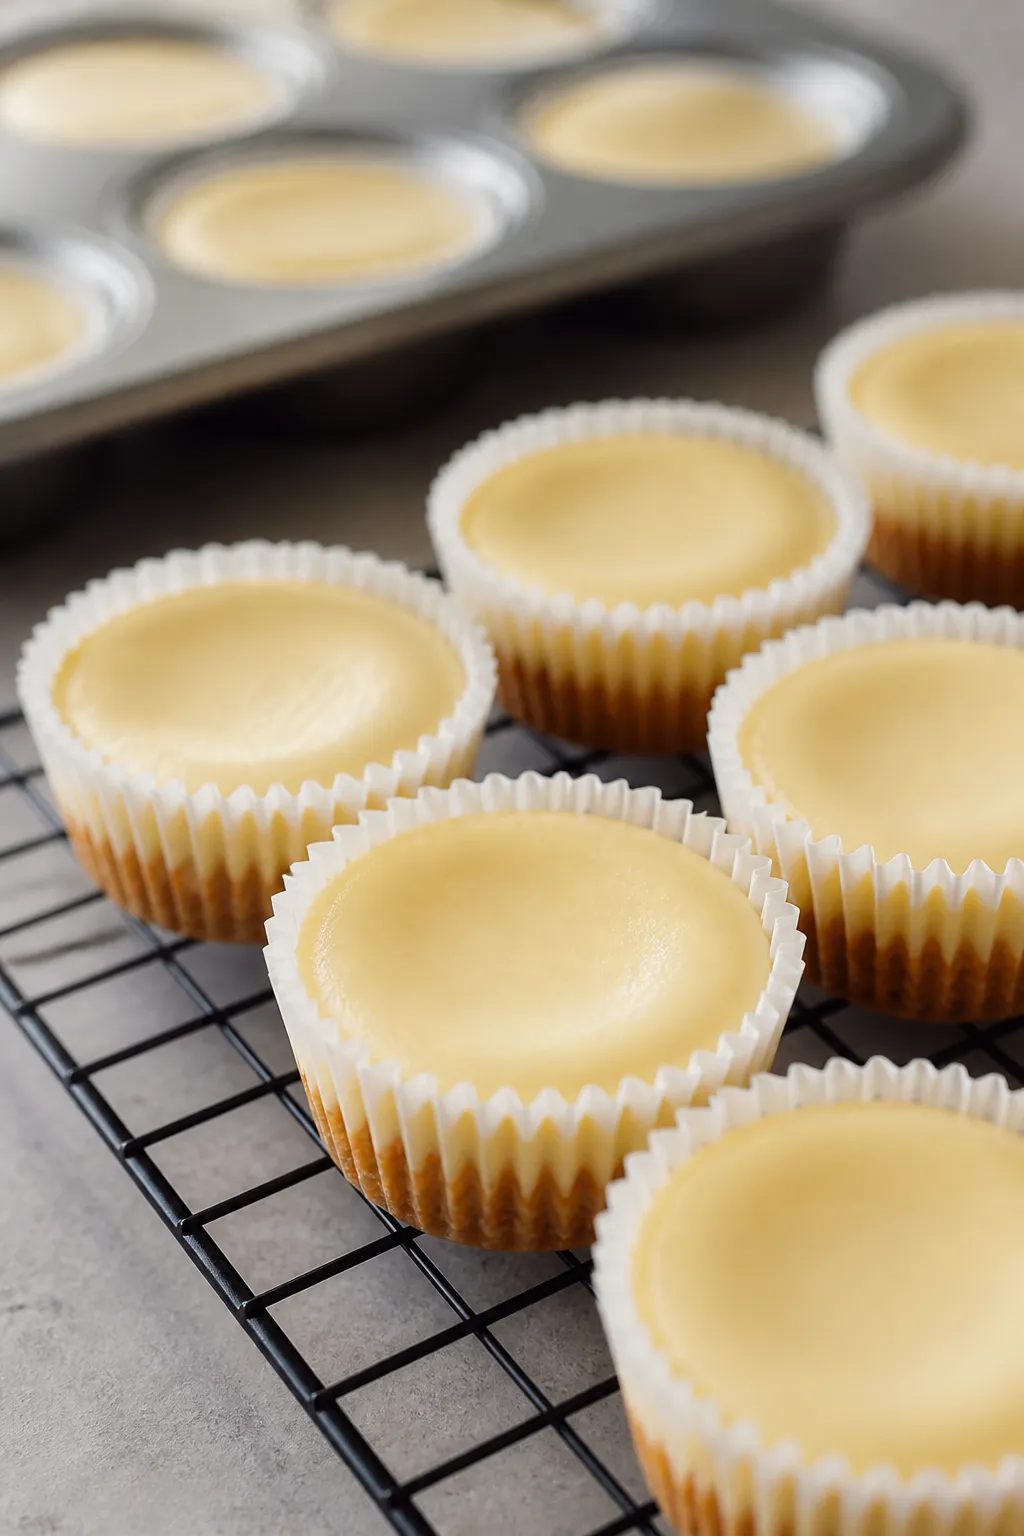
- Bake: Bake at 325°F for 16–18 minutes, or until the edges are set and the centers still jiggle slightly like Jell-O. They will finish setting as they cool.
- Cool gradually: Turn off the oven, crack the door, and let the cheesecakes sit for 10 minutes. Transfer the pan to a rack and cool to room temperature. Refrigerate at least 2 hours, preferably overnight.
- Whip the cream: Beat cold heavy cream, powdered sugar, and vanilla to medium-stiff peaks. Don’t overbeat.
- Assemble the Santa hats: Pipe a small swirl of whipped cream on each cheesecake. Press a hulled strawberry, cut side down, onto the swirl. Pipe a tiny “pom” of cream on the tip.
- Serve: Keep chilled until serving. Add a dusting of powdered sugar right before bringing them out if you like a snowy look.
What Makes This Recipe So Good
- Perfect party size: These single-serve cheesecakes are easy to plate and even easier to grab from a dessert table.
- Fun and festive: The strawberry Santa hats add instant holiday charm without complicated decorating.
- Creamy texture: A smooth, tangy cheesecake filling pairs beautifully with the buttery graham crust.
- Make-ahead friendly: Bake the cheesecakes a day ahead and add the toppings right before serving.
- Balanced sweetness: Not too sweet, so you can enjoy more than one without feeling overwhelmed.
What You’ll Need
- For the crust:
- 1 cup graham cracker crumbs (about 8 full sheets)
- 3 tablespoons granulated sugar
- 5 tablespoons unsalted butter, melted
- Pinch of salt
- For the cheesecake filling:
- 16 ounces cream cheese, softened to room temperature
- 1/2 cup granulated sugar
- 1/4 cup sour cream, room temperature
- 1 teaspoon pure vanilla extract
- 2 large eggs, room temperature
- 1 tablespoon lemon juice (optional, brightens the flavor)
- Pinch of salt
- For the Santa hats:
- 18–24 small to medium strawberries, hulled
- 1 cup heavy whipping cream, cold
- 2 tablespoons powdered sugar
- 1/2 teaspoon vanilla extract
- Tools:
- 12-cup muffin pan (or two if making a larger batch)
- Paper or foil cupcake liners
- Hand mixer or stand mixer
- Piping bag or zip-top bag (for whipped cream)
Instructions
- Prep the pan: Heat the oven to 325°F (163°C).
Line a muffin pan with 12 cupcake liners.
- Make the crust: Stir graham crumbs, sugar, salt, and melted butter until the mixture looks like wet sand. Divide evenly among cups (about 1 tablespoon each). Press firmly with the bottom of a small glass.
- Par-bake the crust: Bake for 5–6 minutes.
Remove and cool while you make the filling.
- Beat the cream cheese: In a large bowl, beat softened cream cheese on medium speed until completely smooth, about 1–2 minutes. Scrape the bowl.
- Add sugar and flavor: Mix in granulated sugar, sour cream, vanilla, lemon juice (if using), and a pinch of salt. Beat until smooth and creamy.
- Add eggs: Beat in the eggs one at a time on low until just combined.
Do not overmix. Scrape the bowl and stir by hand to smooth the batter.
- Fill and smooth: Divide the batter among the cups, filling each about 3/4 full. Tap the pan gently to release air bubbles.
- Bake: Bake at 325°F for 16–18 minutes, or until the edges are set and the centers still jiggle slightly like Jell-O.
They will finish setting as they cool.
- Cool gradually: Turn off the oven, crack the door, and let the cheesecakes sit for 10 minutes. Transfer the pan to a rack and cool to room temperature. Refrigerate at least 2 hours, preferably overnight.
- Whip the cream: Beat cold heavy cream, powdered sugar, and vanilla to medium-stiff peaks.
Don’t overbeat.
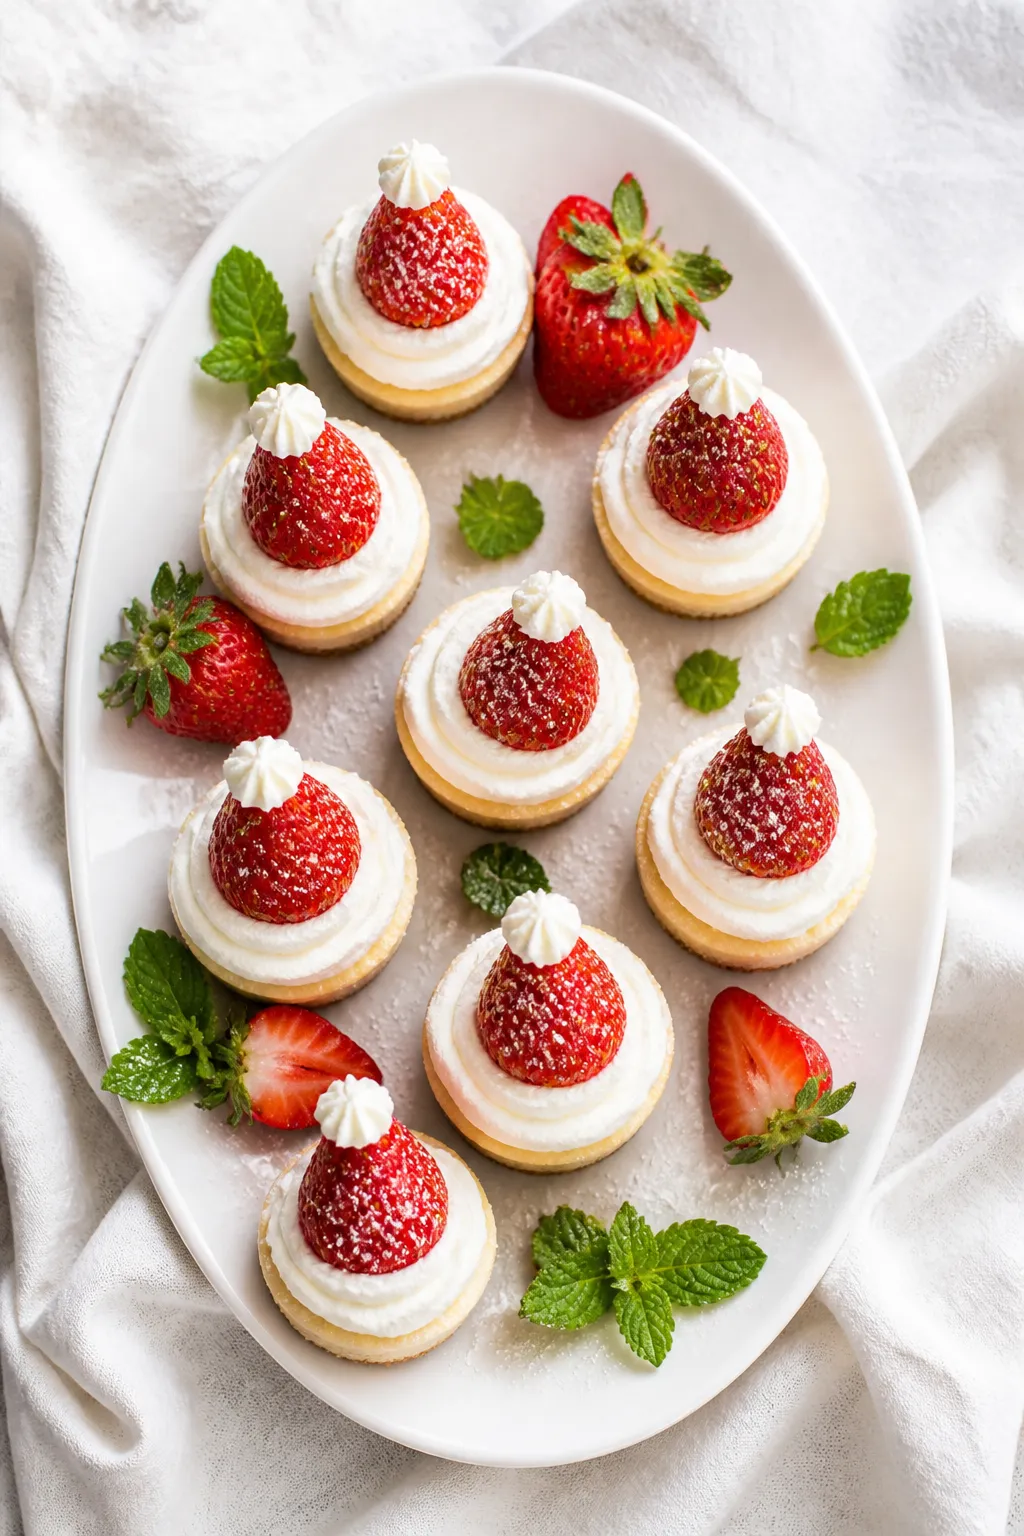
- Assemble the Santa hats: Pipe a small swirl of whipped cream on each cheesecake. Press a hulled strawberry, cut side down, onto the swirl. Pipe a tiny “pom” of cream on the tip.
- Serve: Keep chilled until serving.
Add a dusting of powdered sugar right before bringing them out if you like a snowy look.
How to Store
- Refrigerator: Store cheesecakes (without strawberries) covered for up to 4 days. Add strawberries and whipped cream within a few hours of serving.
- Make ahead: Bake and chill the cheesecakes 1–2 days in advance. Assemble hats the day of.
- Freezer: Freeze baked, cooled, and un-topped cheesecakes in an airtight container for up to 2 months.
Thaw overnight in the fridge, then add toppings.
- Leftovers with toppings: Best within 24 hours due to strawberry moisture.
Benefits of This Recipe
- Kid-friendly: Kids can help place strawberries and pipe the “pom.”
- Portion control: Built-in serving sizes keep things simple for guests.
- Reliable results: Mini cheesecakes are less prone to cracking than full-size ones.
- Customizable: You can tweak flavors without changing the core method.
- Photo-worthy: They look impressive with very little effort.
What Not to Do
- Don’t overbake: If the centers are firm in the oven, they’re overdone. Slight jiggle is ideal.
- Don’t skip room-temperature ingredients: Cold cream cheese leads to lumpy batter.
- Don’t pile on wet berries early: Assembled hats left too long can weep and soften the tops.
- Don’t beat the eggs aggressively: Overmixing adds air and can cause sinking or cracking.
- Don’t skip cooling time: Rushing the chill makes the texture less creamy and stable.
Alternatives
- Crust swaps: Use chocolate wafer crumbs, Oreo crumbs (omit added sugar), or gingersnap crumbs for a spiced holiday twist.
- Dairy tweaks: Greek yogurt can replace sour cream. For a lighter version, use Neufchâtel cream cheese.
- Flavor add-ins: Stir in 1 teaspoon peppermint extract, a swirl of raspberry jam, or a little orange zest.
- Gluten-free: Use certified gluten-free graham crackers or almond flour crust (mix 1 cup almond flour, 2 tablespoons sugar, 4 tablespoons butter).
- No whipped cream? Use stabilized whipped topping, mascarpone whipped cream, or a small dot of vanilla buttercream for the hat details.
- Berry swap: If strawberries are out of season, use small raspberries as mini hats and scale down the whipped cream.
FAQ
How do I prevent cracks in mini cheesecakes?
Let ingredients come to room temperature, mix on low after adding eggs, avoid overbaking, and cool gradually.
Mini cheesecakes are forgiving, but those steps help keep the tops smooth.
Can I make these without a mixer?
Yes, but it’s harder to get the cream cheese completely smooth. If mixing by hand, soften the cream cheese well and stir vigorously with a sturdy spatula until no lumps remain.
Do I need a water bath?
No. Mini cheesecakes bake evenly without one.
Just keep the temperature moderate and don’t overbake.
How do I pick the right strawberries?
Choose small to medium berries with a pointed tip. They should be firm, bright, and dry. Hull them flat so they sit securely on the whipped cream.
Can I use a mini muffin pan?
You can, but reduce bake time to about 10–12 minutes and watch closely.
You’ll also need smaller berries or raspberries for the hats.
How far ahead can I assemble the Santa hats?
Assemble within 2–4 hours of serving for the best look. If you must assemble earlier, dry the strawberries well and add a small barrier of whipped cream to keep moisture off the cheesecake surface.
What if my whipped cream deflates?
Whip to medium-stiff peaks with cold cream and a chilled bowl. For extra stability, add 1–2 teaspoons of instant vanilla pudding mix or 1 tablespoon of mascarpone while whipping.
Can I make these egg-free?
Use a trusted egg-free cheesecake recipe or a no-bake cheesecake base set with whipped cream and a little gelatin.
Bake times and textures will change.
How do I get clean edges when unwrapping the liners?
Chill thoroughly, then peel the liner away slowly. Foil-lined paper liners tend to release more cleanly than plain paper.
What’s the best way to transport them?
Chill until firm, place in a rigid container so they don’t slide, and add the whipped cream “poms” after you arrive if possible.
Wrapping Up
Mini Santa Hat Cheesecakes bring big holiday cheer in a tiny, creamy package. They’re simple to make, easy to serve, and always a crowd-pleaser.
Bake them ahead, top them just before showtime, and watch them disappear. If you’re looking for a festive dessert that’s as practical as it is adorable, this one checks every box.
Printable Recipe Card
Want just the essential recipe details without scrolling through the article? Get our printable recipe card with just the ingredients and instructions.
About the Author

Brandon D
Blogger/Fitness & Wellness Coach
I create quick, healthy, family-friendly recipes that make dinner simple, delicious, and stress-free.