Peppermint Red Velvet Roll Cake – A Festive, Bakery-Style Showstopper
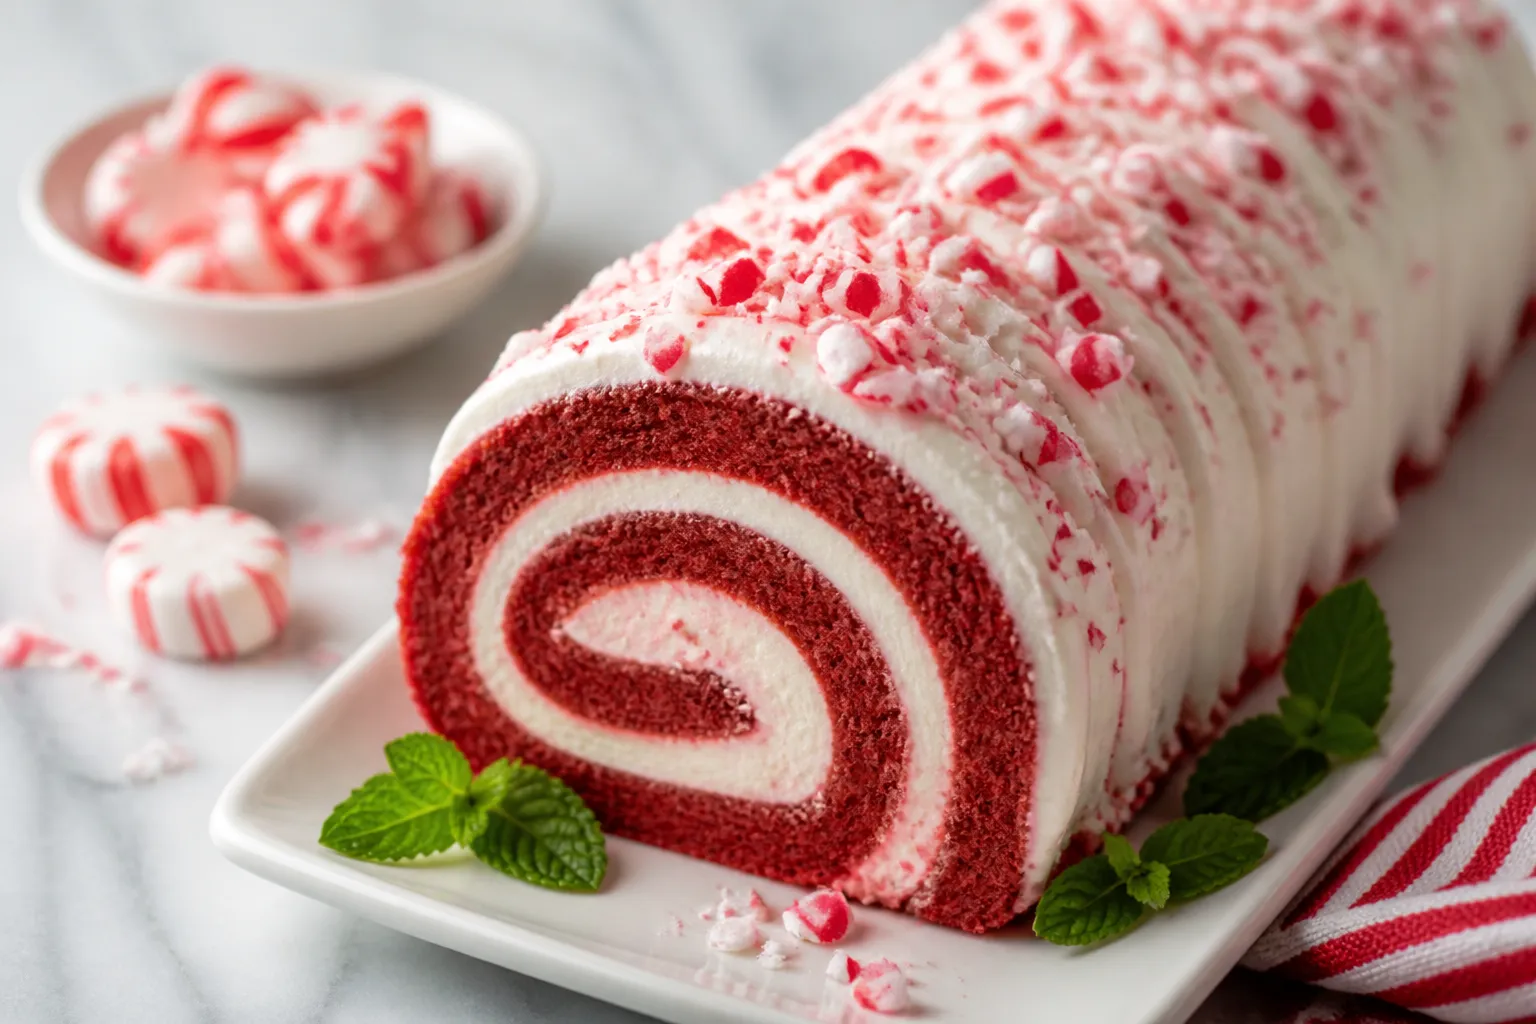
This Peppermint Red Velvet Roll Cake tastes like the holidays wrapped up in a swirl. It’s soft, cocoa-kissed, and filled with a cool peppermint cream that melts into every bite. If you love classic red velvet but want something a little more special, this cake delivers the wow factor with simple steps.
It looks impressive, slices beautifully, and brings that cozy, celebratory vibe to any table. You don’t need fancy tools—just a jelly roll pan, a clean kitchen towel, and a little confidence.
Ingredients
Method
- Prep the pan and oven. Heat oven to 350°F (175°C). Line a 10x15-inch jelly roll pan with parchment, leaving overhang. Lightly grease the paper.
- Whip the eggs and sugar. In a mixing bowl, beat eggs and granulated sugar on high for 3–4 minutes until thick, pale, and ribbony. This aeration gives the cake its lift.
- Add oil, vanilla, and color. Beat in vegetable oil, vanilla, and red food coloring until evenly tinted.
- Combine dry ingredients. In a separate bowl, whisk flour, cocoa powder, baking powder, baking soda, and salt to break up clumps.
- Fold and finish the batter. Sift dry ingredients over the egg mixture. Fold gently with a spatula in 2–3 additions, alternating with buttermilk. Mix just until smooth. Do not overmix.
- Bake. Spread batter evenly in the pan. Tap once to release large bubbles. Bake 10–12 minutes, until the top springs back when touched and a toothpick comes out clean. Do not overbake.
- Prepare the towel roll. While the cake bakes, lay a clean towel on the counter and dust generously with powdered sugar. This prevents sticking.
- Invert and roll warm. Immediately after baking, run a knife around the edges. Invert the hot cake onto the sugared towel and peel off the parchment. Starting at a short end, roll the cake up with the towel inside. Let cool completely on a rack, seam side down.
- Make the filling. Beat cream cheese and butter until smooth and fluffy. Add powdered sugar, peppermint extract, vanilla, and salt. Beat until creamy. If using, stream in heavy cream and whip until light and spreadable. Taste and adjust peppermint—it should be fresh but not overpowering.
- Unroll and fill. Gently unroll the cooled cake. Spread an even layer of filling, leaving a 1/2-inch border at the far edge. Sprinkle with crushed candy canes for crunch.
- Re-roll and chill. Re-roll the cake (without the towel) and wrap tightly in parchment or plastic. Chill 30–60 minutes to set the shape.
- Finish and serve. Dust with powdered sugar, drizzle with melted white chocolate, or add more crushed candy canes on top. Slice with a sharp, warm knife for clean cuts.
What Makes This Special

This cake balances rich red velvet flavor with a light, refreshing peppermint finish. The sponge is tender and flexible, so it rolls without cracking when handled right.
The filling is a creamy blend of cream cheese, butter, and peppermint, whipped until fluffy and spreadable. Crushed candy canes add a bit of sparkle and crunch for texture contrast. It’s festive without being overly sweet, and the slice-and-serve format makes it perfect for gatherings.
What You’ll Need
- For the red velvet sponge:
- 3 large eggs, room temperature
- 3/4 cup granulated sugar
- 2 tablespoons vegetable oil
- 1 teaspoon vanilla extract
- 1 tablespoon red liquid food coloring (or gel, adjusted as needed)
- 3/4 cup all-purpose flour, spooned and leveled
- 2 tablespoons unsweetened cocoa powder
- 1 teaspoon baking powder
- 1/4 teaspoon baking soda
- 1/4 teaspoon fine salt
- 1/4 cup buttermilk, room temperature
- Powdered sugar, for dusting the towel
- For the peppermint cream filling:
- 8 ounces cream cheese, softened
- 4 tablespoons unsalted butter, softened
- 1 1/2 cups powdered sugar, sifted
- 1/2 teaspoon peppermint extract (adjust to taste)
- 1 teaspoon vanilla extract
- Pinch of salt
- 1/3 cup heavy cream (optional, for extra fluffiness)
- 1/3–1/2 cup crushed peppermint candies or candy canes
- For finishing:
- Powdered sugar or melted white chocolate for drizzle (optional)
- Extra crushed candy canes for garnish
- Equipment:
- 10×15-inch jelly roll pan
- Parchement paper
- Clean, lint-free kitchen towel
- Stand mixer or hand mixer
Instructions
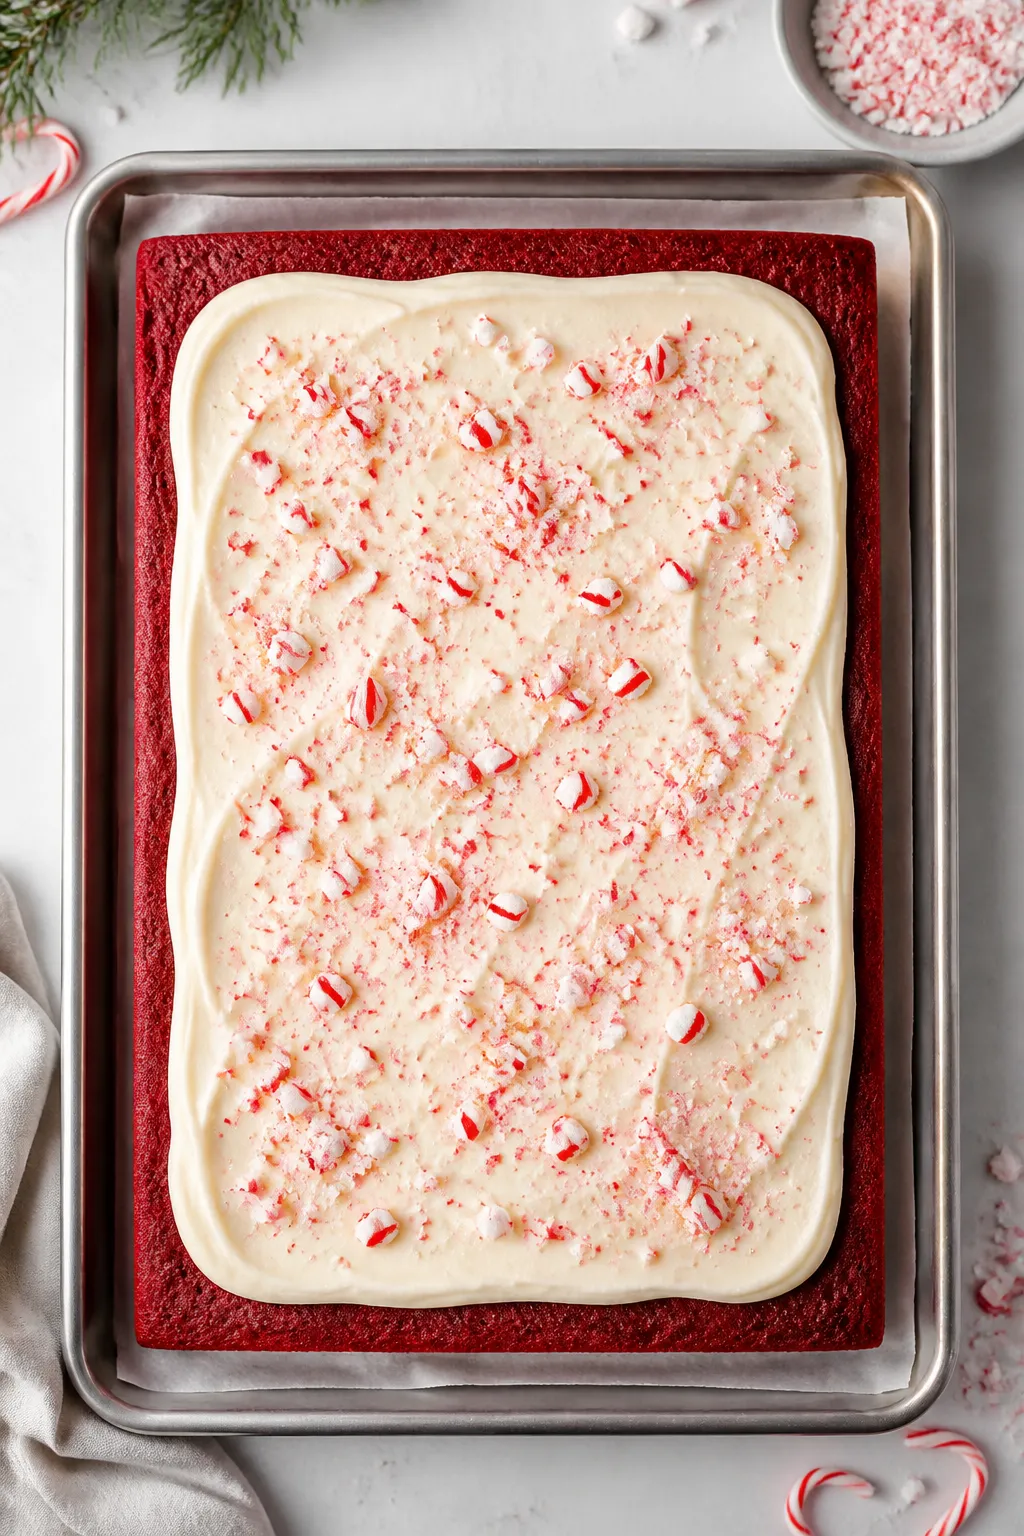
- Prep the pan and oven. Heat oven to 350°F (175°C).
Line a 10×15-inch jelly roll pan with parchment, leaving overhang. Lightly grease the paper.
- Whip the eggs and sugar. In a mixing bowl, beat eggs and granulated sugar on high for 3–4 minutes until thick, pale, and ribbony. This aeration gives the cake its lift.
- Add oil, vanilla, and color. Beat in vegetable oil, vanilla, and red food coloring until evenly tinted.
- Combine dry ingredients. In a separate bowl, whisk flour, cocoa powder, baking powder, baking soda, and salt to break up clumps.
- Fold and finish the batter. Sift dry ingredients over the egg mixture.
Fold gently with a spatula in 2–3 additions, alternating with buttermilk. Mix just until smooth. Do not overmix.
- Bake. Spread batter evenly in the pan.
Tap once to release large bubbles. Bake 10–12 minutes, until the top springs back when touched and a toothpick comes out clean. Do not overbake.
- Prepare the towel roll. While the cake bakes, lay a clean towel on the counter and dust generously with powdered sugar.
This prevents sticking.
- Invert and roll warm. Immediately after baking, run a knife around the edges. Invert the hot cake onto the sugared towel and peel off the parchment. Starting at a short end, roll the cake up with the towel inside.
Let cool completely on a rack, seam side down.
- Make the filling. Beat cream cheese and butter until smooth and fluffy. Add powdered sugar, peppermint extract, vanilla, and salt. Beat until creamy.
If using, stream in heavy cream and whip until light and spreadable. Taste and adjust peppermint—it should be fresh but not overpowering.
- Unroll and fill. Gently unroll the cooled cake. Spread an even layer of filling, leaving a 1/2-inch border at the far edge. Sprinkle with crushed candy canes for crunch.
- Re-roll and chill. Re-roll the cake (without the towel) and wrap tightly in parchment or plastic.
Chill 30–60 minutes to set the shape.
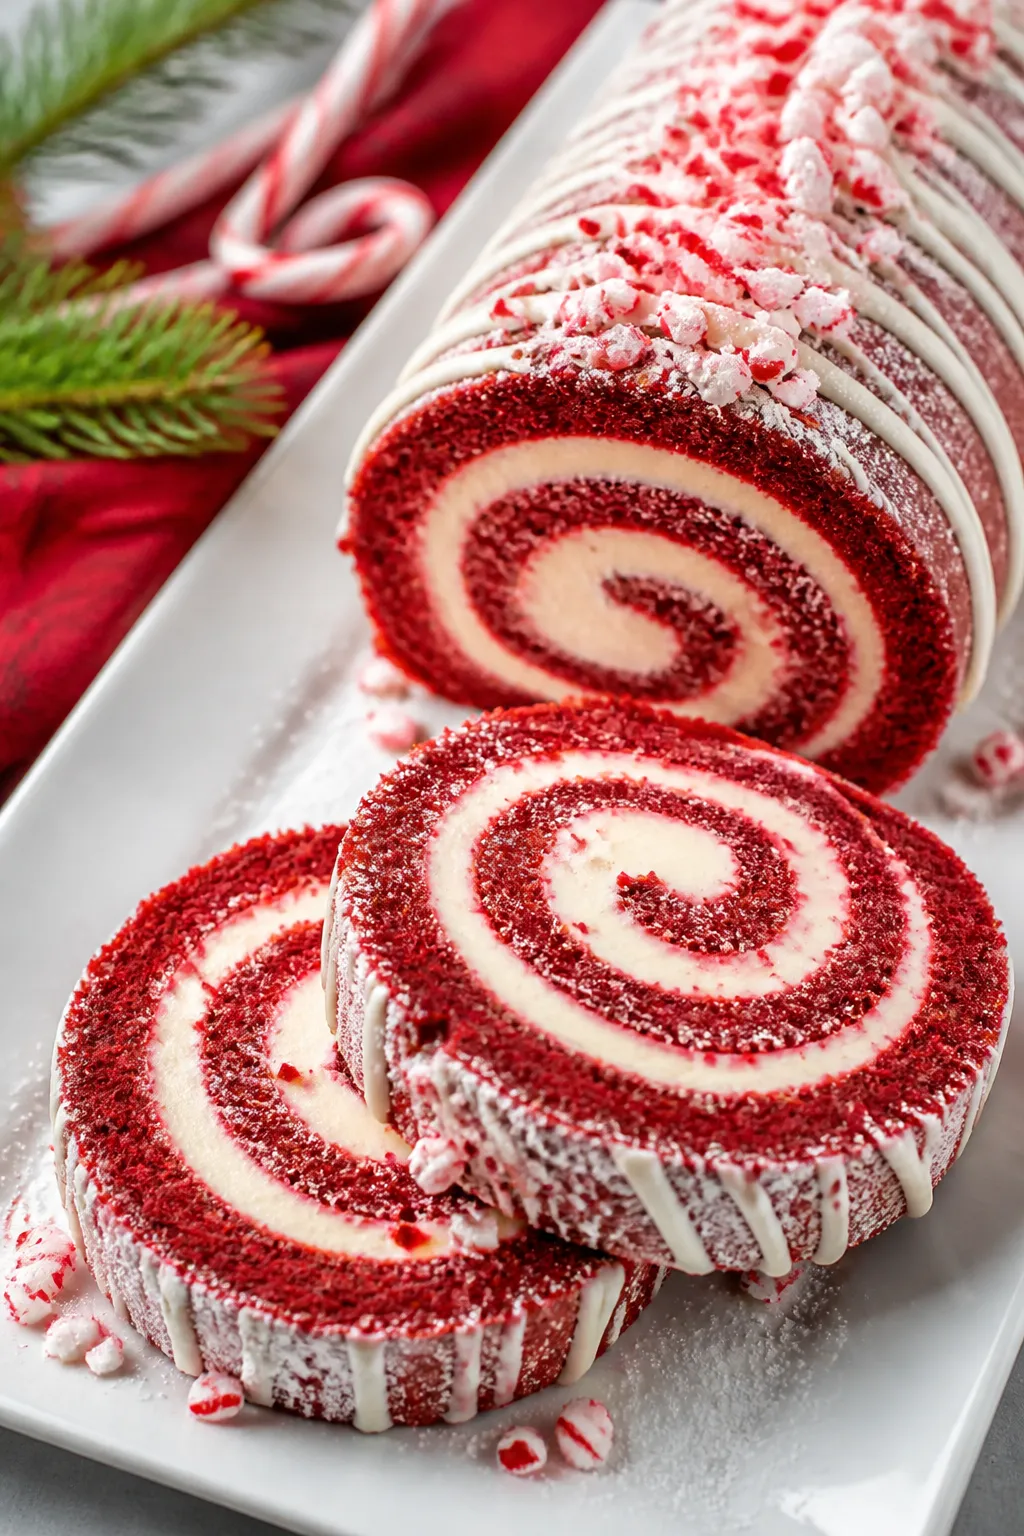
- Finish and serve. Dust with powdered sugar, drizzle with melted white chocolate, or add more crushed candy canes on top. Slice with a sharp, warm knife for clean cuts.
How to Store
Keep the roll cake tightly wrapped and refrigerated for up to 3 days. The texture actually improves after a few hours as the flavors meld.
For longer storage, freeze the filled roll (well wrapped) for up to 1 month. Thaw overnight in the fridge before serving. Avoid leaving it at room temperature for more than 2 hours due to the cream cheese.
Health Benefits
- Portion-friendly dessert: A roll cake offers neat, modest slices, helping with portion control.
- Lower fat sponge: The cake itself uses minimal oil compared to butter-heavy layer cakes.
- Protein and calcium: Cream cheese adds small amounts of protein and calcium.
- Mood-boosting flavors: Peppermint’s aroma can feel refreshing and energizing, while cocoa adds that chocolate comfort factor.
While it’s still a treat, small tweaks—like using reduced-fat cream cheese or cutting back on garnish—can make it a bit lighter without losing the holiday feel.
What Not to Do
- Don’t skip whipping the eggs well. This sponge relies on air for lift; under-whipped eggs lead to a dense, crack-prone cake.
- Don’t overbake. Even a couple extra minutes can dry it out, making rolling difficult.
- Don’t cool the cake flat. Always roll while warm to “train” the cake into shape.
- Don’t overpower with peppermint. Start small and taste the filling; extract strength varies widely.
- Don’t spread filling edge-to-edge. Leave a border so it doesn’t ooze out when you roll.
Alternatives
- Gluten-free: Use a 1:1 gluten-free flour blend designed for baking.
Add an extra tablespoon of buttermilk if the batter feels thick.
- Dairy-free: Swap in dairy-free cream cheese and butter, and use almond or oat-based cream. Check candy canes for dairy-free status.
- Less peppermint: Replace half the peppermint extract with vanilla or almond extract for a softer mint profile.
- Chocolate fill: Fold mini chocolate chips into the filling or use a light chocolate whipped cream for a mint-chocolate vibe.
- Decoration twist: Finish with crushed freeze-dried raspberries for tart contrast and a pretty look.
FAQ
How do I prevent cracks when rolling?
Roll the cake while it’s still warm and pliable, using a sugared towel. Don’t overbake, and handle it gently when unrolling.
If a small crack happens, frosting and toppings can disguise it.
Can I make it ahead?
Yes. Bake, fill, and roll the cake up to a day in advance. Keep it wrapped in the fridge.
Add final dusting and garnish just before serving for best texture.
What if I don’t have a jelly roll pan?
You can use a rimmed baking sheet close to 10×15 inches. If your pan is larger, spread the batter so it stays about the same thickness and check for doneness a minute early.
Is gel or liquid food coloring better?
Gel gives stronger color with less liquid, but liquid works fine here. Start with less and add until you reach a vibrant red that still looks natural.
Can I skip the candy cane pieces?
Absolutely.
They add crunch and sparkle, but the cake is great with just the peppermint cream. For texture, try finely chopped white chocolate or toasted nuts.
How do I get clean slices?
Chill the roll until firm, then use a sharp knife dipped in hot water and wiped dry between cuts. Gentle sawing motions help keep the swirl intact.
What’s the best way to crush candy canes?
Seal them in a zip-top bag and tap with a rolling pin.
Aim for mixed bits and dust—not huge chunks—to avoid tearing the cake when you slice.
In Conclusion
This Peppermint Red Velvet Roll Cake brings bakery elegance to your kitchen with simple, reliable steps. The tender red velvet sponge, cool minty cream, and cheerful candy cane crunch make it a natural centerpiece for any holiday table. It’s easy to serve, easy to store, and endlessly adaptable.
Once you master the warm roll technique, you’ll want to make this one every season—peppermint and all.
Printable Recipe Card
Want just the essential recipe details without scrolling through the article? Get our printable recipe card with just the ingredients and instructions.
About the Author

Brandon D
Blogger/Fitness & Wellness Coach
I create quick, healthy, family-friendly recipes that make dinner simple, delicious, and stress-free.