Chocolate Covered Cherry Cheesecake – A Classic Dessert With A Lush Finish
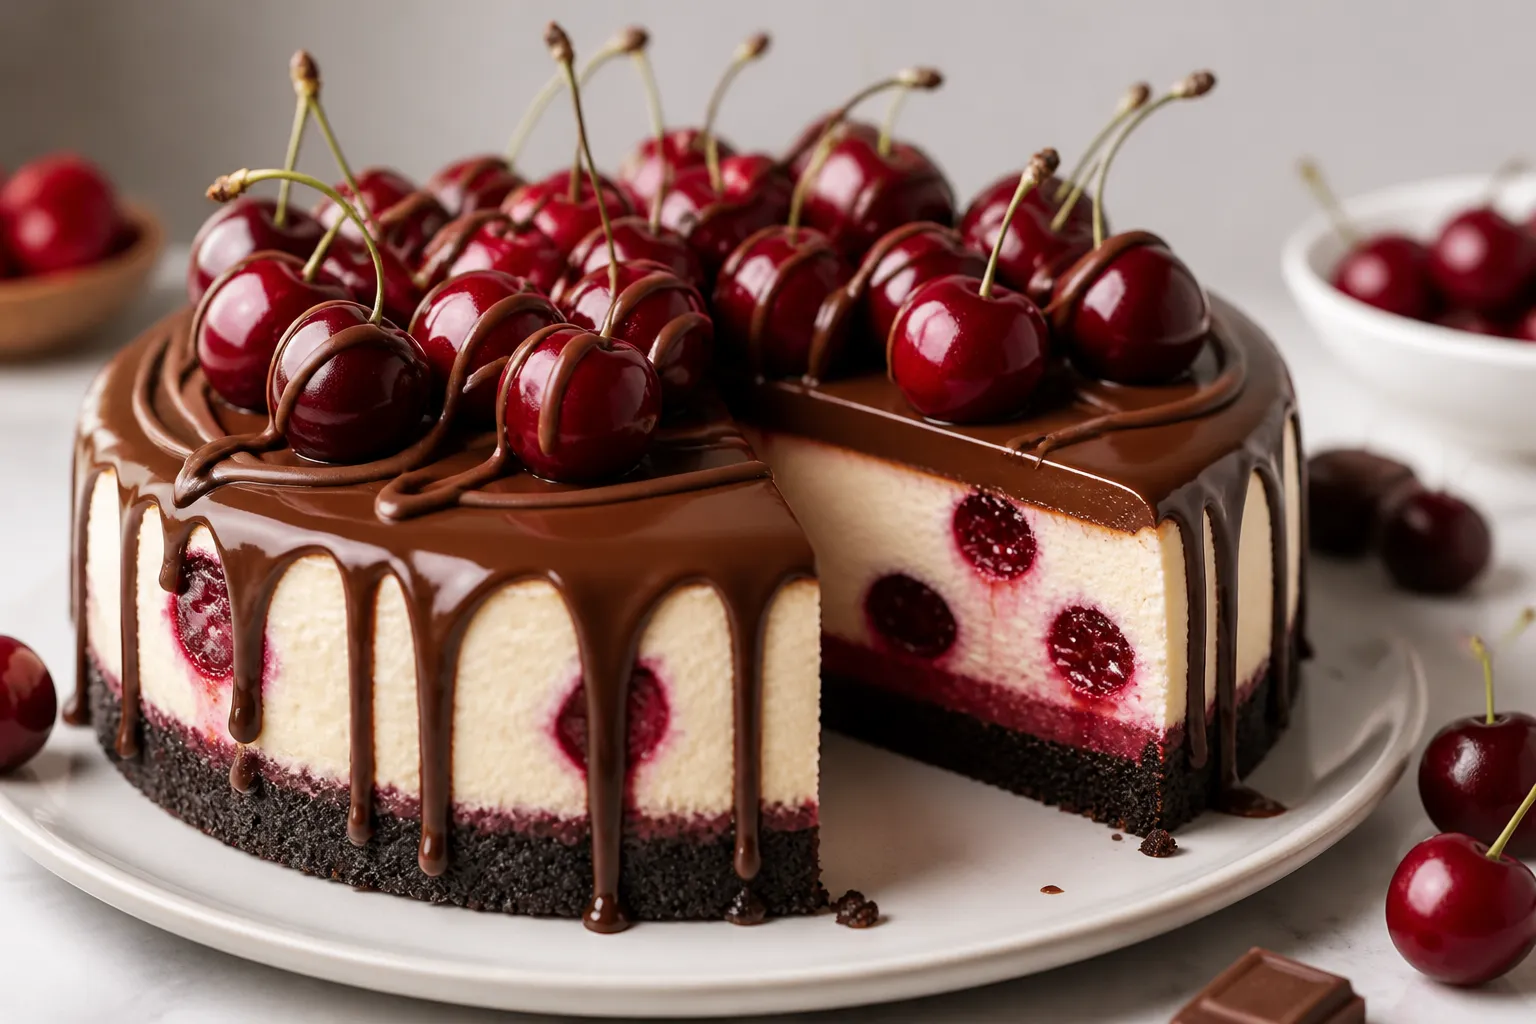
If you’re the kind of person who pauses at the sight of a cherry cordial or a silky slice of cheesecake, this dessert will make you smile. Chocolate Covered Cherry Cheesecake blends a buttery chocolate cookie crust, a smooth vanilla cheesecake, sweet-tart cherries, and a glossy chocolate shell on top. It looks showy, but it’s totally doable for a home baker.
The balance of textures—crisp, creamy, juicy, and snappy—keeps every bite interesting. Make it for a birthday, a holiday, or just because you want something a little indulgent.
Ingredients
Method
- Prep your pan and oven: Heat oven to 325°F (163°C). Wrap the outside of a 9-inch springform pan with two layers of heavy-duty foil. This protects against water leaks. Lightly grease the inside.
- Make the crust: Mix cookie crumbs, melted butter, sugar, and salt. Press firmly into the bottom and slightly up the sides of the pan. Bake for 8 minutes, then cool while you make the filling.
- Blend the cheesecake base: Beat cream cheese on medium speed until smooth and fluffy, about 2 minutes. Add sugar and beat until silky. Mix in sour cream, heavy cream, vanilla, cornstarch, and salt. Scrape the bowl often.
- Add the eggs: Beat in eggs one at a time on low speed. Stop when just combined. Overmixing adds air, which can cause cracks.
- Pour and smooth: Pour the batter over the crust. Tap the pan gently on the counter to pop large air bubbles.
- Set up the water bath: Place the foil-wrapped pan in a large roasting pan. Pour hot water into the roasting pan until it reaches halfway up the sides of the springform.
- Bake low and slow: Bake 60–75 minutes until edges are set and the center wobbles like Jell-O. Do not bake until firm. That’s how you keep it creamy.
- Cool gradually: Turn off the oven, crack the door, and let the cheesecake sit for 45 minutes. Then remove from the water bath, unwrap the foil, and cool to room temperature.
- Chill overnight: Cover and refrigerate at least 6 hours, preferably overnight. The texture tightens and flavors deepen.
- Make the cherry layer: If using pie filling, skip to the next step. For homemade compote, simmer cherries, sugar, and lemon juice for 5–7 minutes. Stir cornstarch with 1 tablespoon water, add to the pan, and cook until glossy and thick. Cool completely.
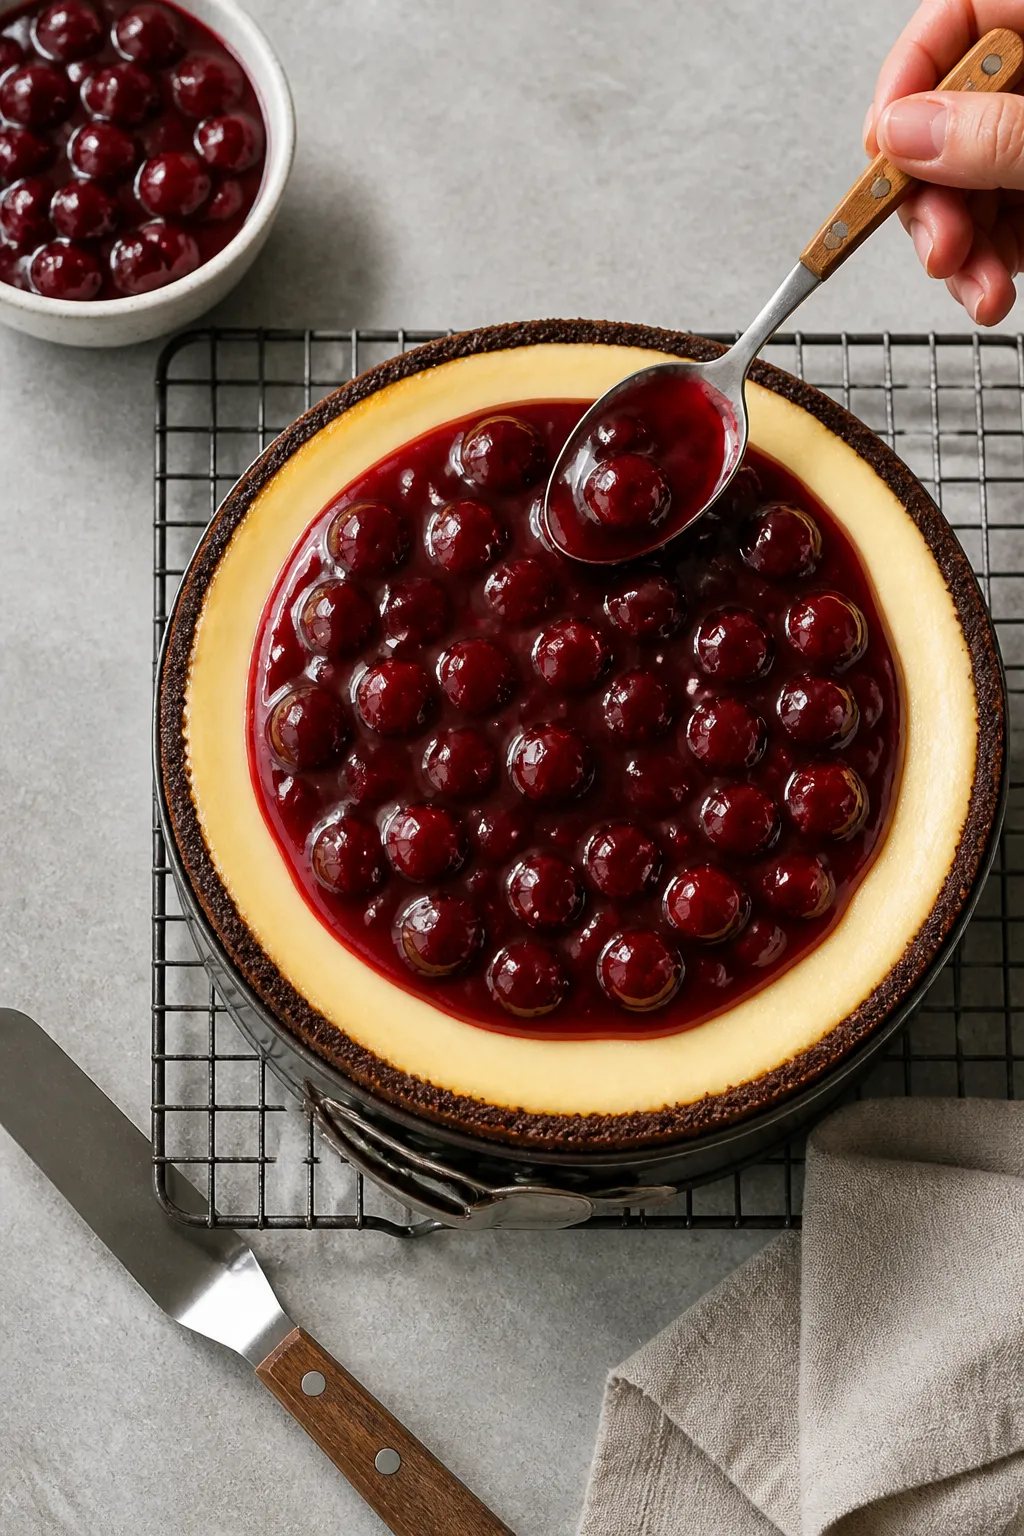
- Add cherries: Once the cheesecake is fully chilled, release it from the springform ring and transfer to a serving plate. Spread an even layer of cherry pie filling or cooled compote over the top, leaving a small 1/2-inch border.
- Make the ganache: Heat cream to steaming (not boiling). Pour over chopped chocolate with butter and corn syrup. Let sit 2 minutes, then stir until smooth and shiny.
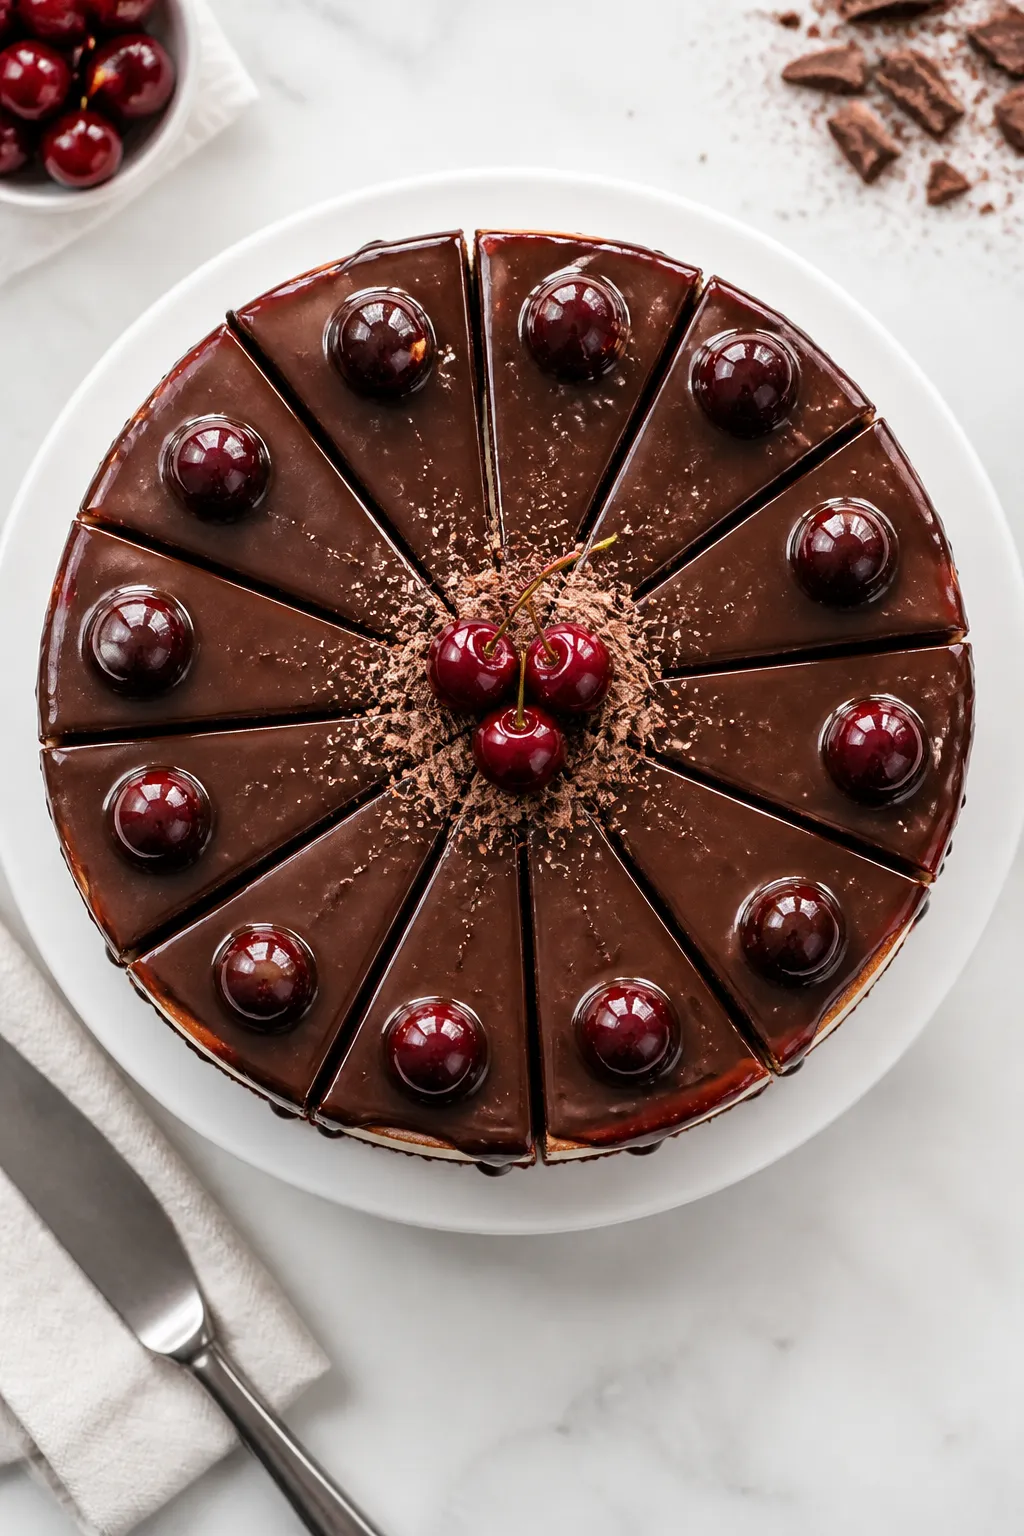
- Finish with chocolate: Pour ganache over the cherries and tilt the cake to spread gently. The goal is a glossy “chocolate-covered” effect with a few drips down the sides.
- Set and serve: Chill 30–45 minutes to set the ganache. Slice with a hot, clean knife for tidy wedges.
Why This Recipe Works
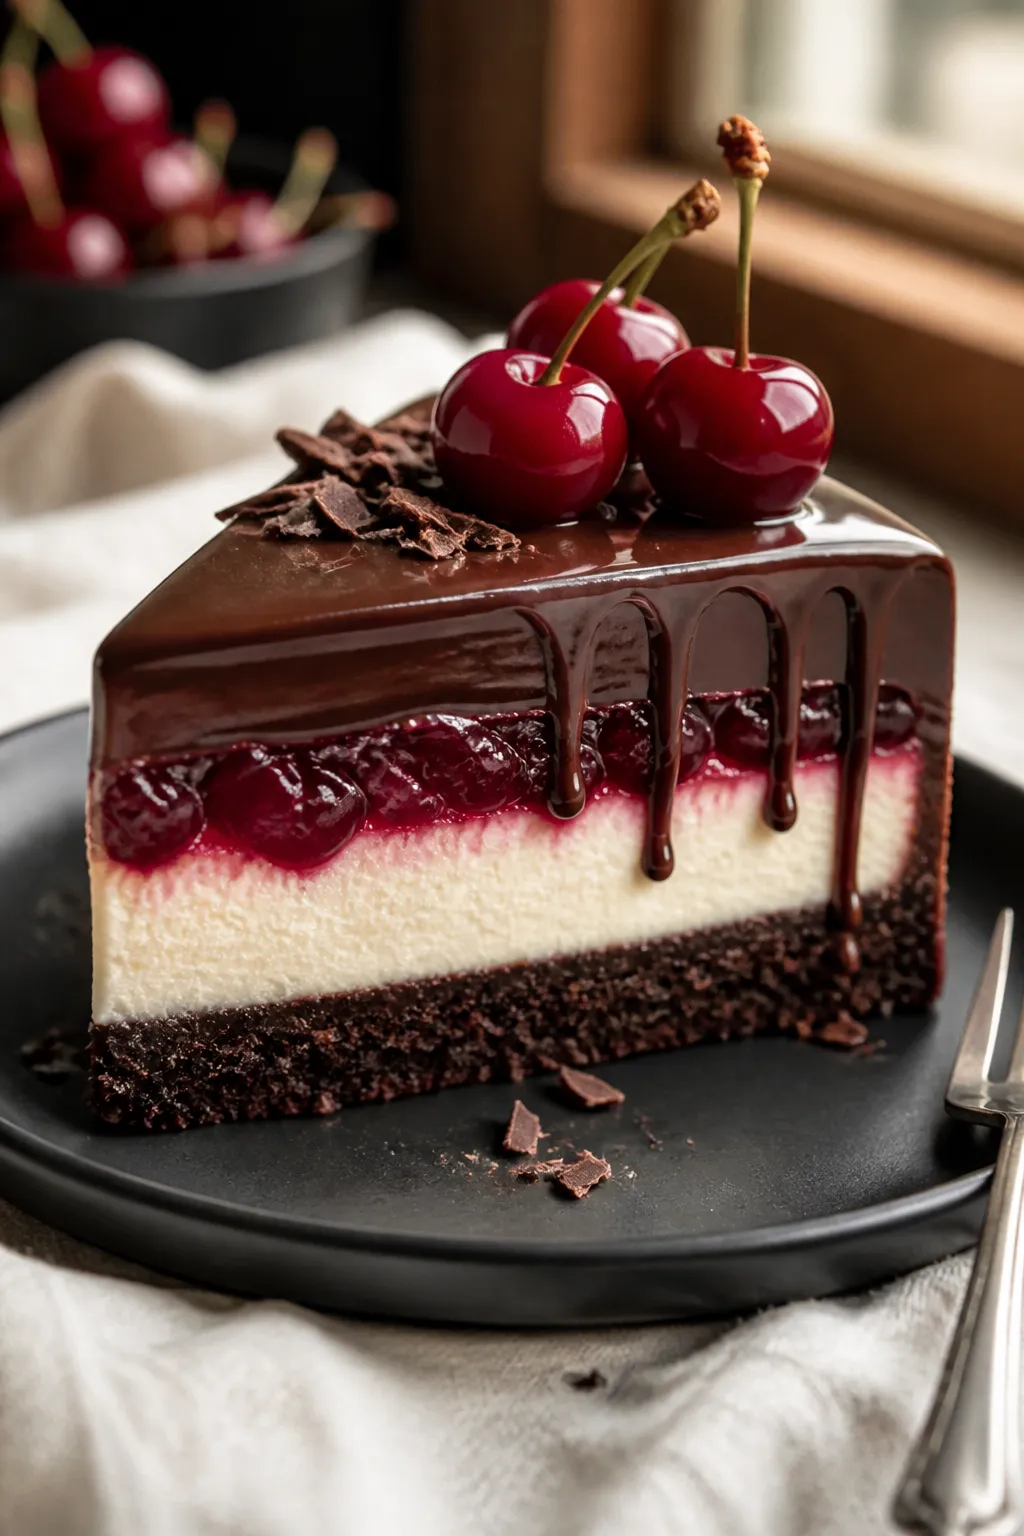
- Balanced layers: A crunchy chocolate cookie crust supports a creamy cheesecake, cherry topping, and a shiny chocolate ganache. Each layer has a distinct texture and flavor, so nothing feels one-note.
- Cherry brightness: The cherries cut through the richness.
That pop of tart fruit prevents the chocolate and cream cheese from feeling heavy.
- Gentle baking method: A low-and-slow bake with a water bath helps reduce cracks and ensures a silky texture.
- Easy make-ahead: Cheesecake tastes better the next day, which makes this perfect for entertaining.
- Approachable ingredients: You can use canned cherry pie filling or a quick homemade cherry compote. Simple swaps keep the recipe accessible.
Ingredients
- For the crust:
- 2 cups chocolate wafer or chocolate sandwich cookie crumbs (filling removed if using sandwich cookies)
- 5 tablespoons unsalted butter, melted
- 2 tablespoons granulated sugar
- Pinch of salt
- For the cheesecake:
- 24 ounces cream cheese, softened to room temperature
- 3/4 cup granulated sugar
- 1/2 cup sour cream, room temperature
- 1/2 cup heavy cream, room temperature
- 3 large eggs, room temperature
- 1 tablespoon cornstarch (or 2 teaspoons flour)
- 2 teaspoons pure vanilla extract
- 1/4 teaspoon fine salt
- For the cherry layer:
- 1 1/2 to 2 cups cherry pie filling, or
- 2 cups pitted sweet or sour cherries, 1/3 cup sugar, 1 tablespoon lemon juice, and 1 tablespoon cornstarch (for homemade compote)
- For the chocolate topping:
- 6 ounces semi-sweet or dark chocolate, finely chopped
- 1/2 cup heavy cream
- 1 tablespoon unsalted butter (for sheen)
- 1 teaspoon corn syrup (optional, for extra gloss)
How to Make It
- Prep your pan and oven: Heat oven to 325°F (163°C). Wrap the outside of a 9-inch springform pan with two layers of heavy-duty foil.
This protects against water leaks. Lightly grease the inside.
- Make the crust: Mix cookie crumbs, melted butter, sugar, and salt. Press firmly into the bottom and slightly up the sides of the pan.
Bake for 8 minutes, then cool while you make the filling.
- Blend the cheesecake base: Beat cream cheese on medium speed until smooth and fluffy, about 2 minutes. Add sugar and beat until silky. Mix in sour cream, heavy cream, vanilla, cornstarch, and salt.
Scrape the bowl often.
- Add the eggs: Beat in eggs one at a time on low speed. Stop when just combined. Overmixing adds air, which can cause cracks.
- Pour and smooth: Pour the batter over the crust.
Tap the pan gently on the counter to pop large air bubbles.
- Set up the water bath: Place the foil-wrapped pan in a large roasting pan. Pour hot water into the roasting pan until it reaches halfway up the sides of the springform.
- Bake low and slow: Bake 60–75 minutes until edges are set and the center wobbles like Jell-O. Do not bake until firm.
That’s how you keep it creamy.
- Cool gradually: Turn off the oven, crack the door, and let the cheesecake sit for 45 minutes. Then remove from the water bath, unwrap the foil, and cool to room temperature.
- Chill overnight: Cover and refrigerate at least 6 hours, preferably overnight. The texture tightens and flavors deepen.
- Make the cherry layer: If using pie filling, skip to the next step.
For homemade compote, simmer cherries, sugar, and lemon juice for 5–7 minutes. Stir cornstarch with 1 tablespoon water, add to the pan, and cook until glossy and thick. Cool completely.
- Add cherries: Once the cheesecake is fully chilled, release it from the springform ring and transfer to a serving plate.
Spread an even layer of cherry pie filling or cooled compote over the top, leaving a small 1/2-inch border.
- Make the ganache: Heat cream to steaming (not boiling). Pour over chopped chocolate with butter and corn syrup. Let sit 2 minutes, then stir until smooth and shiny.
- Finish with chocolate: Pour ganache over the cherries and tilt the cake to spread gently.
The goal is a glossy “chocolate-covered” effect with a few drips down the sides.
- Set and serve: Chill 30–45 minutes to set the ganache. Slice with a hot, clean knife for tidy wedges.
How to Store
- Refrigerate: Keep the cheesecake covered and chilled for up to 5 days. A cake dome or an inverted bowl works well to protect the ganache.
- Freeze: For longer storage, freeze slices without ganache for up to 2 months.
Wrap tightly in plastic, then foil. Thaw overnight in the fridge and add fresh ganache before serving.
- Transporting: Keep it cold. A chilled metal sheet pan under the cake helps maintain temperature on the go.
Health Benefits
- Cherries bring antioxidants: Cherries contain anthocyanins and vitamin C, which support recovery and fight oxidative stress.
- Portion mindfulness: Cheesecake is rich, so smaller slices satisfy.
Pairing with fresh fruit can make a little go a long way.
- Protein from dairy: Cream cheese and sour cream add protein and calcium. Balance your day’s meals around this treat.
- Customizable sweetness: Using dark chocolate and a homemade cherry compote lets you control added sugar.
What Not to Do
- Don’t skip room temperature ingredients: Cold cream cheese forms lumps and overmixing won’t fix it.
- Don’t overbake: A firm center leads to a dry, grainy texture. Pull it when it still wiggles.
- Don’t skip the water bath: It helps prevent cracking and promotes even baking.
- Don’t spread hot ganache on warm cherries: Heat on heat will slide right off.
Both layers should be cool.
- Don’t rush chilling: The cheesecake needs time to set for clean slices and the best flavor.
Recipe Variations
- Black Forest Style: Add 1 tablespoon kirsch to the cherry compote and shave dark chocolate over the ganache.
- White Chocolate Twist: Swap the ganache for white chocolate ganache and a mix of cherries and raspberries.
- Gluten-Free: Use gluten-free chocolate cookies for the crust and ensure thickeners are certified gluten-free.
- No-Bake Shortcut: Use a no-bake crust (extra butter to bind) and a gelatin-stabilized cheesecake filling, then top with cherries and ganache.
- Mini Cheesecakes: Bake in a lined muffin tin for 18–22 minutes. Top each with a spoonful of cherries and a drizzle of ganache.
- Extra-Chocolate Base: Stir 2 tablespoons cocoa powder into the crust crumbs for deeper chocolate flavor.
FAQ
How do I prevent cracks in the cheesecake?
Cracks usually come from overmixing, overbaking, or fast temperature changes. Keep mixing gentle, bake in a water bath, and cool slowly in the oven with the door cracked.
Even if a small crack appears, the cherry and chocolate layers will cover it.
Can I use frozen cherries?
Yes. Thaw them first, then use the juices in your compote for extra flavor. If the compote looks thin, add a touch more cornstarch slurry and simmer until glossy.
What chocolate is best for the topping?
Use a quality semi-sweet or dark chocolate between 55% and 70% cacao.
It melts smoothly and balances the sweet cherries. Milk chocolate works, but it will be sweeter and softer.
Do I have to use a springform pan?
A springform pan makes unmolding very easy. If you only have a deep 9-inch cake pan, line it with a long strip of parchment and an overhanging round so you can lift the cheesecake out once chilled.
Why is my crust crumbly?
It likely needs more butter or firmer tamping.
Press the crumbs down with the bottom of a measuring cup and bake the crust briefly to set the fats. If using very dry wafers, add an extra tablespoon of butter.
How do I get clean slices?
Use a sharp knife dipped in hot water and wiped dry between each cut. Gentle pressure works better than sawing.
Chill the cheesecake well so the ganache isn’t too soft.
In Conclusion
Chocolate Covered Cherry Cheesecake is a showstopper with honest, familiar flavors. The smooth cheesecake, bright cherries, and glossy chocolate finish come together in a dessert that feels special without being fussy. Make it a day ahead, slice it clean, and enjoy that perfect mix of creamy, fruity, and rich in every bite.
It’s the kind of treat people remember—and ask you to make again.
Printable Recipe Card
Want just the essential recipe details without scrolling through the article? Get our printable recipe card with just the ingredients and instructions.
About the Author

Brandon D
Blogger/Fitness & Wellness Coach
I create quick, healthy, family-friendly recipes that make dinner simple, delicious, and stress-free.